3 Widgets

Widgets: More Than Meets the Eye
Custom and System Widgets
Widget-based Homepages integrate system widgets, or customized Widgets, as a means for generating content.
To view and add Widgets to your Homepage, click on Course Admin > Site Setup > Widgets. There you will see a list of all of the system and custom Widgets available for placement on your Homepage. This screen is only for managing Widgets, you cannot add them to your Homepage from this screen; Widgets are added from the Homepages page (Course Admin > Site Setup > Homepages).
Custom Widgets
Custom Widgets are created by instructors or system administrators; the list below contains Kirkwood-specific custom Widgets.

-
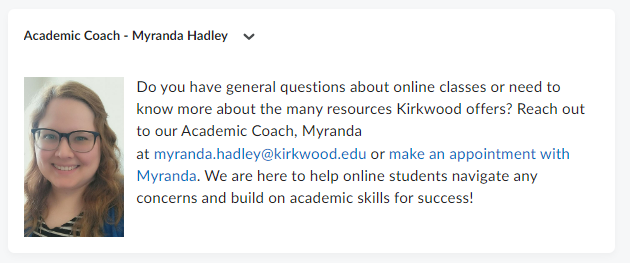
- Academic Coach: Myranda Hadley: for use with any online course; presents Myranda’s contact information
- Ally Instructor Tools: produces a course accessibility report
- Attendance: links to attendance report page
- Certificates and Badges: links to the awards page
- Course Evaluations – Explorance Blue: provides students access to their course evaluation forms
- Course Exam Information: gives information to online students with monitored exams
- Daily Image: shares a randomly-selected image; the widget must be copied in order to use
- ePortfolio: links to the ePortfolio tool
- Groups: provides students access to the Groups tool
- Hawkes Learning Instructors: sets up a link for connection to the Hawkes system; instructors only
- Hawkes Learning Students: links students to their Hawkes system
- Instructor Information: allows instructors to add contact info. (please note you must copy this to edit and customize)
- Kirkwood Quality Matters Completion Badge: displayed on online courses that have successfully completed the Quality Matters review
- Library Contact: gives contact info for Library
- Library Databases: links to all Library Databases
- Library Guides: links to Library Guides
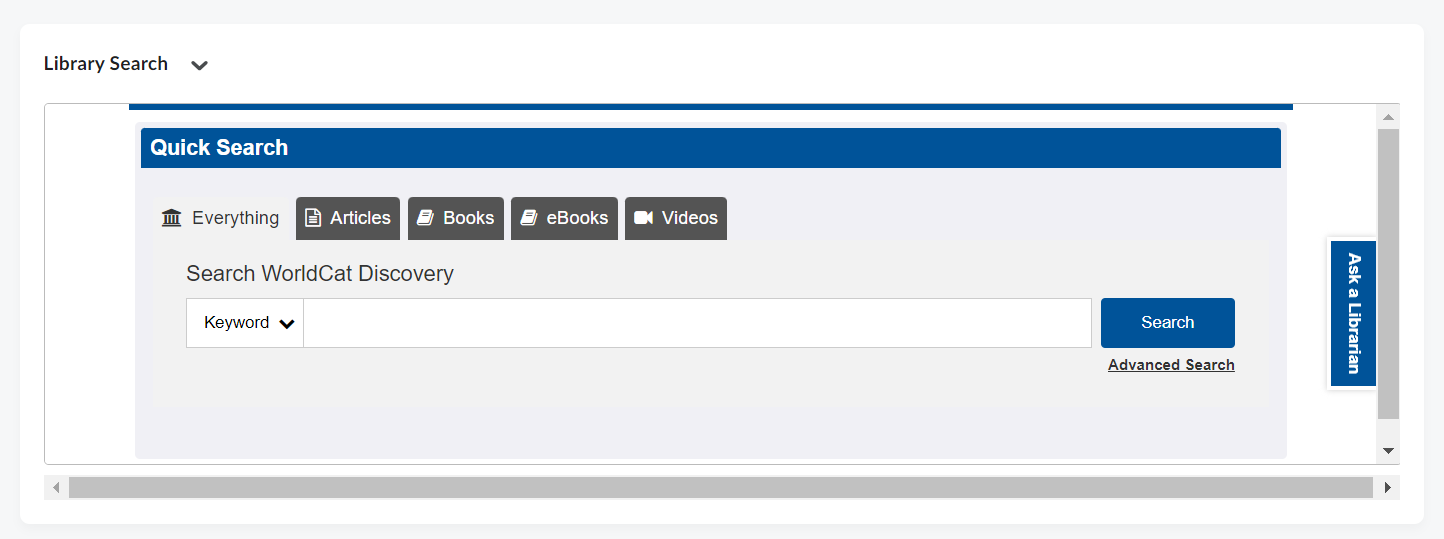
- Library Search: searches the Library Catalog

-
- MHCampus (Connect): gives the publisher link for MHCampus (Connect)
- Pulse App: provides a link for students to download the Pulse App
- Quick Eval: links to the quick eval tool. Instructor only
- Remind: composes Remind texts and send
- Remind Link: links to Remind.com login page
- Talon Tools: links directly to the Assignments, Discussions, or Quizzes page
- Turnitin: provides students with a direct link to the Assignments page and a video tutorial for accessing their Turnitin reports
- Tutoring: has links and info regarding tutoring options for students
- Update your Contact Information: allows students to update their contact information
- Virtual Classroom Setup: creates Bongo assignments or virtual meetings
- WebLive Class: shares information about WebLive classes
- Welcome to Talon Resources: links to Talon tutorials for Students
System Widgets
Below is a list of all the system Widgets available in Talon. Some Widgets, as noted, only show for specific roles in the system (e.g. for instructors and not for students).
-
- Access Google Workspace: N/A
- Activity Feed: allows instructor to post updates, announcements, reminders and then students can comment
- Admin Tools: displays any administrative tools you have access to
- Announcements: communicate announcements and course updates to students
- Auditors: N/A for instructors/students; only applicable for those with Auditor role
- Bookmarks: provides a list of bookmarked course content
- Calendar: view the course Calendar
- Content Browser: displays a Table of Contents from Course Content
- Course Administration: same options as Course Admin link; instructors only
- Course Overview: statistical analysis for course engagement
- Getting Started: N/A
- Google Search: search Google
- Google Workspace: N/A
- Kaltura: N/A
- Learning Repository (LOR): search/Publish to the LOR
- Macmillan Tools: links to Macmillan publisher tools
- McGraw Hill Connect: links to McGraw Hill Connect
- Multi-Profile Widget: displays instructors’ profile image and information
- My Courses: lists all of your courses
- My Org Units: gives access to administrators only
- My Settings: displays user settings
- MyLab and Mastering Links: gives links to Pearson’s MyLabs and Mastering platforms
- Office 365: accesses Kirkwood student email and Office 365 documents; students only
- Quick Eval: accesses the quick evaluation tool filtered to the course your are in; instructors only
- Students at Risk: for instructors only and only in courses that have a student success system model enabled
- Role Switch: provides view of your course as a student or other role; instructors only.
- Tasks: allows for viewing and managing tasks from the Calendar tool; tasks are always personal, you cannot create tasks for your students
- Updates: is customizable to show new emails, new submissions, ungraded items, and unread Discussion posts
- User Links: allows you to create a personal list of links to external websites
- Visual Table of Contents Widget: displays the Course Content Modules as individual cards with completion tracking information
- Welcome Widget Widget: displays a popup screen on course login with a series of steps created as content in a “Welcome” Module under Course Content
Creating Your Own Widgets
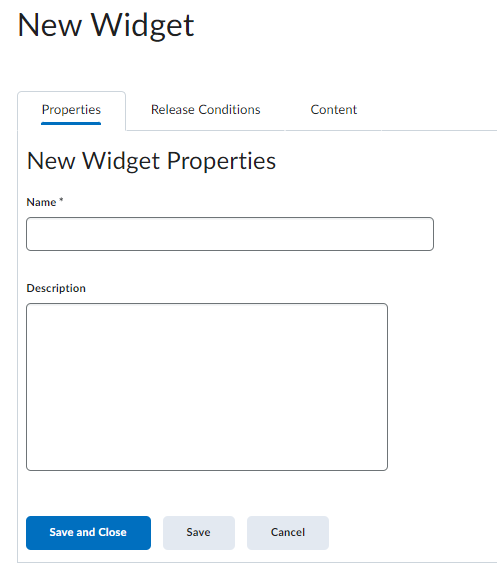
You can also create your own custom Widgets. To create a custom Widget, click on Course Admin > Site Setup > Widgets and click “Create Widget.”

Under the “Properties” tab add a Name (required) and Description for your Widget; the description is for your own reference and will not be shown to students. The “Release Conditions” tabs lets you control which users can see this widget. The “Content” tab allows you to enter the content of the Widget and gives you access to a full HTML editor which includes options for including text, videos, images, links, and more. Under this tab you can preview your Widget as well. (For custom Widget ideas, visit Widget Central in the Brightspace Community.) In order to place the Widget on your Homepage you’ll need to edit the Homepage.
Creating Zoom Student Help Hours as a Recurring Meeting
-
- Log into Zoom
- Click the Meetings link on the left side
- Click on Schedule a Meeting
- Name your meeting under “Topic” – “Student Help Hours” or “Office Hours” are good suggestions
- Click the Recurring meeting checkbox
- Under the Recurring meeting dropdown menu, select the “No Fixed Time” option
- Make sure that Enable Waiting Room is checked; other optional settings can be set based on your preferences
- Click Save
Adding the Instructor Information Widget to Your Course
Step 1: copying and editing the instructor information Widget
-
- Click Course Admin > Site Setup > Widgets > Custom Widgets > Instructor Information
- Copy the widget by clicking on the two pages icon and confirm
- Find the “Instructor Information – Copy” widget and click the associated pencil icon to edit it
- Remove the “Copy” from the title in the “Name” tab
- Click the “Content” tab to enter your picture, name and contact information. It is a best practice to also include your Student Help Hours / Office Hours as well as the associated ZOOM link for those times.
- Click the Save and Close button
Step 2: adding your instructor widget to the Homepage
-
- Click Course Admin > Site Setup > Homepages
- Click on the active Homepage link
- Click the Add Widgets button in the layout area in which you want it placed
- Select the appropriate “Instructor Information” widget (the one you customized) and click the Add button
- If you change your mind on the widget’s location you can drag it into another layout area
- Hit the Save and Close button
[VIDEO CONTENT FORTHCOMING]

