9 Grades

Grading in Talon
Grade Setup Wizard
Running the Grade Book Setup Wizard customizes your Talon Grade Book settings. To do this, go to “Grades” in the Navbar and click “Setup Wizard.” To begin customizing, click the Start button at the bottom of the page.
Step 1: Choose a Grading System
Step 1 is deciding how your Grade Book calculates grades; there are three options:
- Weighted: this mode weighs distinct grade categories (e.g., 60% exams, 40% homework).
- Points: this mode totals point without any category weights
- Formula: this mode applies a final grade according to a special formula created by an instructor
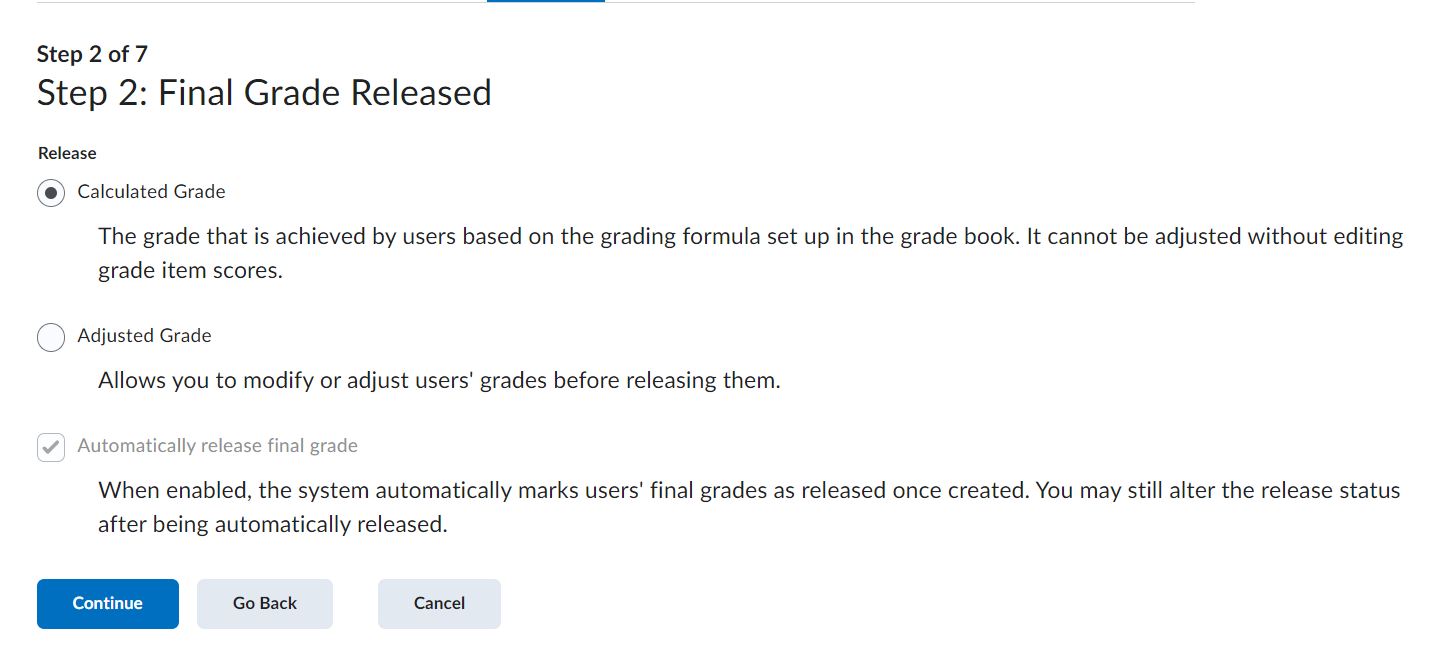
Step 2: Final Grade Released
Step 2 is choosing a final grade calculation method. You can choose Calculated, which displays a final grade based on the grading system from Step 1, or Adjusted.
An “Adjusted” final grade allows you to make adjustments (for example, if you round up or curve grades) instead of automatically releasing the score based solely on automatic calculations. Please note that “final” grade means “cumulative” grade in this situation. It is recommended to release the “Calculated” grade first, and then if you do plan to use the “Adjusted” grade, release that at the end of the semester to avoid confusing students.
During Step 2 you can set Talon to automatically release the final grade.
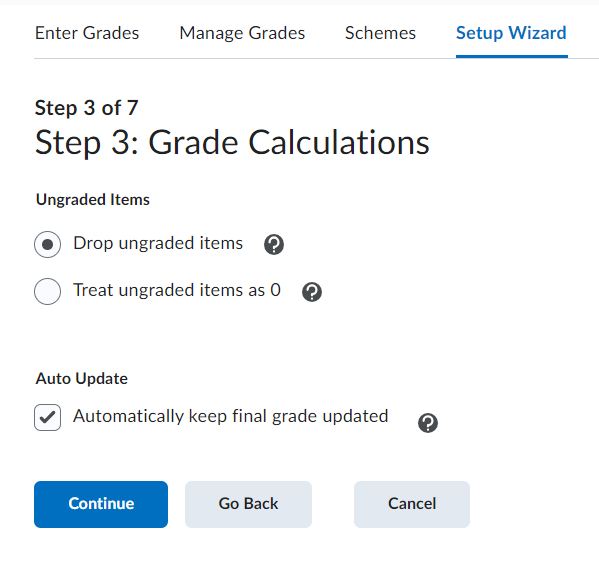
Step 3: Grade Calculations
Step 3 is choosing whether to “Treat ungraded items as 0” or to “Drop ungraded items” from a final calculation.
If you choose to “Treat ungraded items as 0,” you will want to inform students of this because they will likely see an F or an artificially low grade until the class ends. If you choose to “Drop ungraded items,” missing assignments do not count against a student’s score, so their grade may be slightly artificially inflated. Because of this it’s best to select “Treat ungraded items as 0” option.
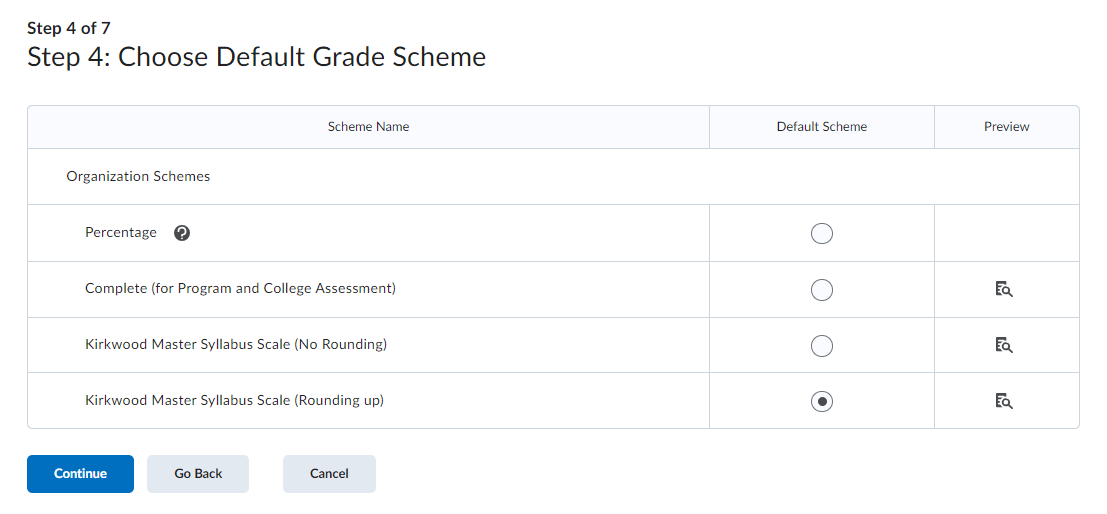
Step 4: Choose Default Grade Scheme
Step 4 is selecting your Grade Scheme. The Grade Scheme is your grading scale – usually a letter corresponding to a range of percentages.
You can choose one of the system grade scales offered or create your own. The percentage grade scheme displays the percentages students earn on their graded items and totals for your course — no letter grade appears in this scheme.
Step 5: Managing View Display Options
Step 5 is customizing how many decimal places will display in student grades.
Step 6: Student View Display Options
Step 6 is tailoring a student’s view options.
- Points Grade: displays points instead of percentages for students in grade reports
- Grade Scheme Symbol: displays letter grades for students or percentage, depending on the grade scheme selected in Step 4
- Grade Scheme Color: displays different colors for different letter grades
Step 7: Grades Setup Summary
Step 7 is reviewing the complete list of your setting preferences. If they all look good, you can click the Finish button to return to the Manage Grades page.
[VIDEO CONTENT FORTHCOMING]
Managing Grades
Under Grades > Manage Grades you see a list of all your grade items. From this screen, you can add or edit Grade Items and categories.
Adding Categories
Categories are used for weighing groups of grades, organizing scores, and dropping the lowest from a group of scores.
Categories are optional; however, they are nice for organizational purposes. If you breakdown your grade calculation by category in the syllabus, it is strongly recommended to create a Grade Book reflecting that organizational structure.
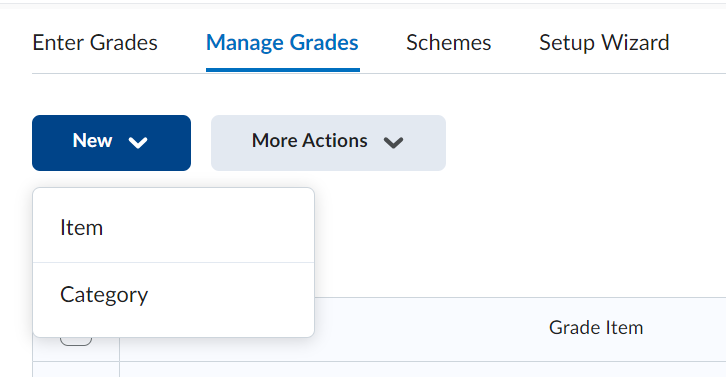
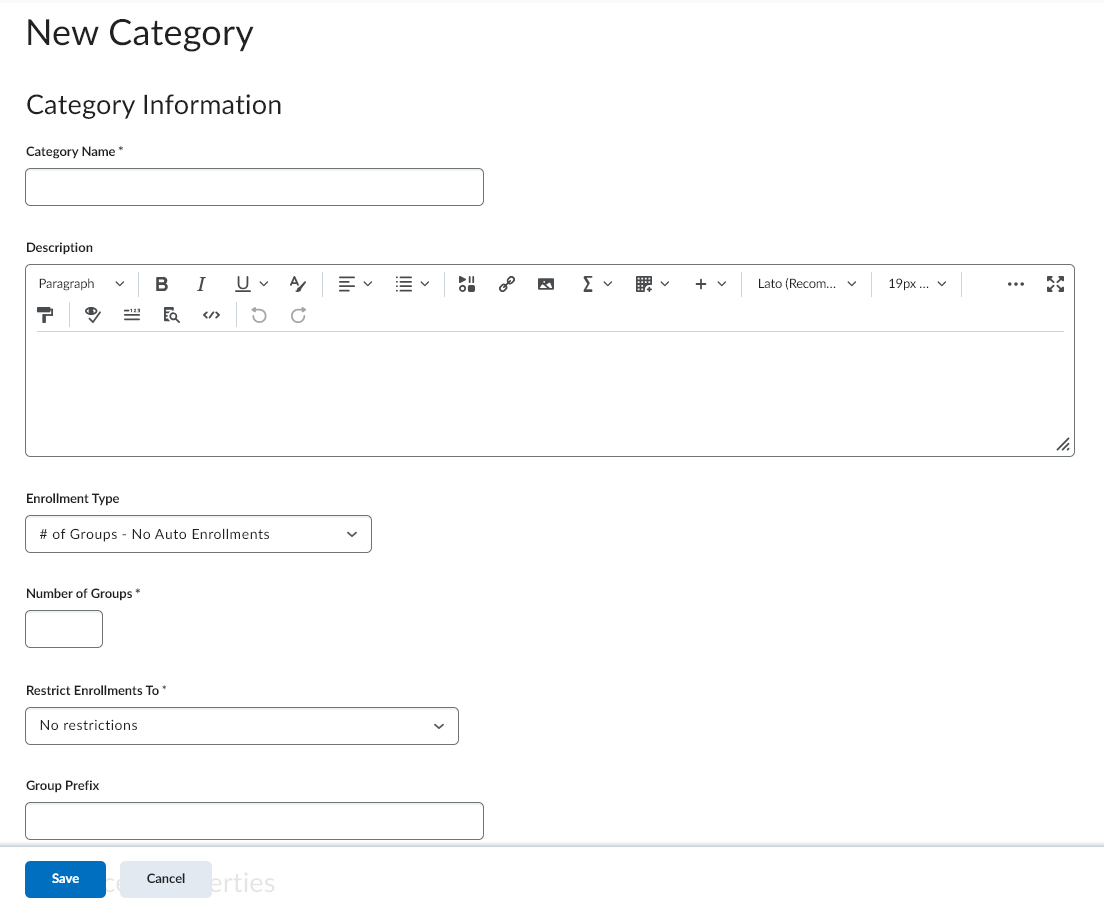
To do so, click the New button and choose “Category.”
Next, add a title for the category, and a description if you choose.
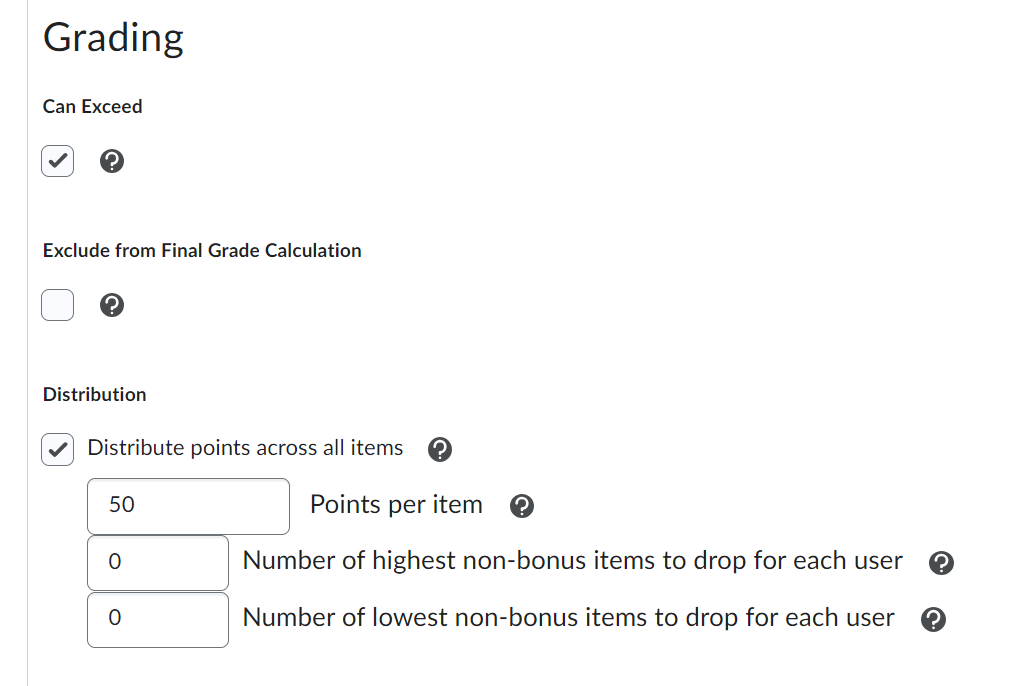
If you plan to have any extra credit assignments within the category, you’ll need to check the “Can Exceed” box so the extra credit will count towards the overall grade calculation.
If you want to drop the lowest or highest assignments within a category, you can adjust the Distribution settings. In order to do this, however, all assignments within the category must be set to equal point values. Also, note that when you drop the lowest item from a category, the first grade the student earns in that category will be dropped.
Adding a New Grade Item
You can add Grade Items on individual content topics through Course Admin > Assessment > Assignment. For items that are not tied to content topics (e.g. Assignments, Discussions, Quizzes), you can add a Grade Item through Grades > Manage Grades; click on the New button and select “Item” from the dropdown menu.
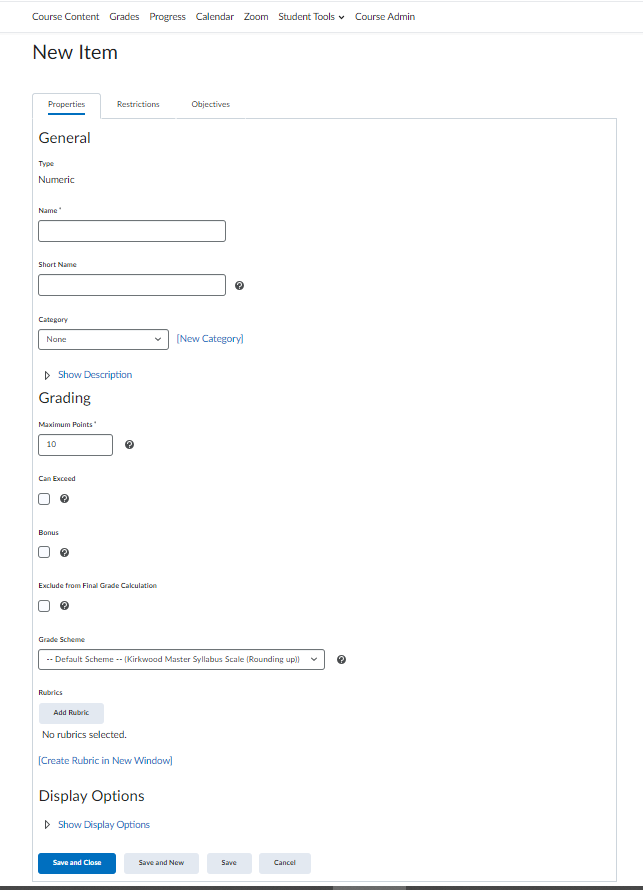
Choose the type of Grade Item. For most situations, you will choose “Numeric,” meaning an instructor is entering a point value. Please note that “Numeric” is the only Grade Item type that can be tied to a Content Item such as an Assignment, Discussion or Quiz.
The “Pass/Fail” item is useful for courses with required activities for compliance where the emphasis is completion over points. The “Text” item is useful if you are using a publisher website or publishing your grades somewhere else other than in Talon.
Once a Grade Item is selected the next step is adjusting the following options:
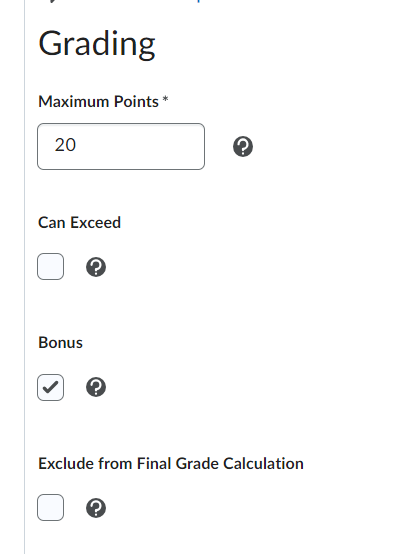
- Maximum Points: assigns the total number of points for the assignment
- Can Exceed: allows entering more points than the maximum
- Bonus: makes the Grade Item for extra credit
- Exclude from Final Grade Calculation: excludes an assignment from a final grade calculation
- Grade Scheme: best practice argues for leaving the Grade Scheme set as the default
- Rubrics: rubrics can be added here, if desired
You can always return to edit a Grade Item by clicking on the action arrow [V] next to the item and clicking “Edit Grade Item.”
[VIDEO CONTENT FORTHCOMING]
Entering Grades
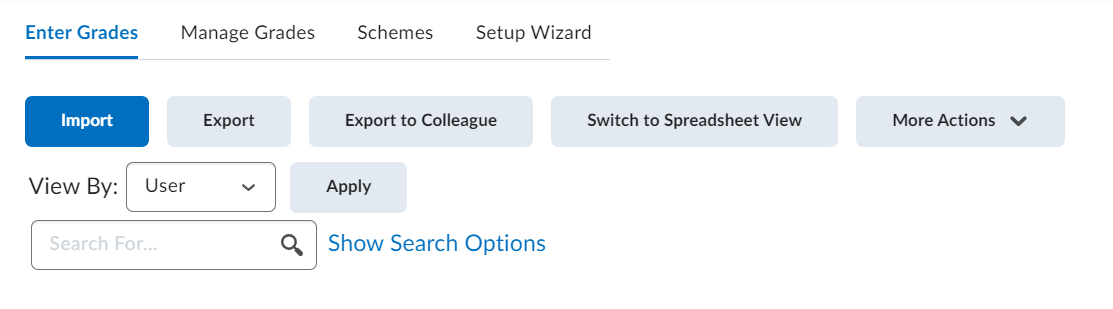
From Grades > Enter Grades you can manually enter grades as well as view and grade student submissions on Content Topics.
Manually Entering Grades
You may have some assignments that are not tied to a Content Topic, such as an Assignment done in-class. For these Assignments, you will manually enter grades.
From the Enter Grades page, you can click an Assignment title and choose “Grade All”; this takes you to your class list where you can enter grades and feedback for each student.
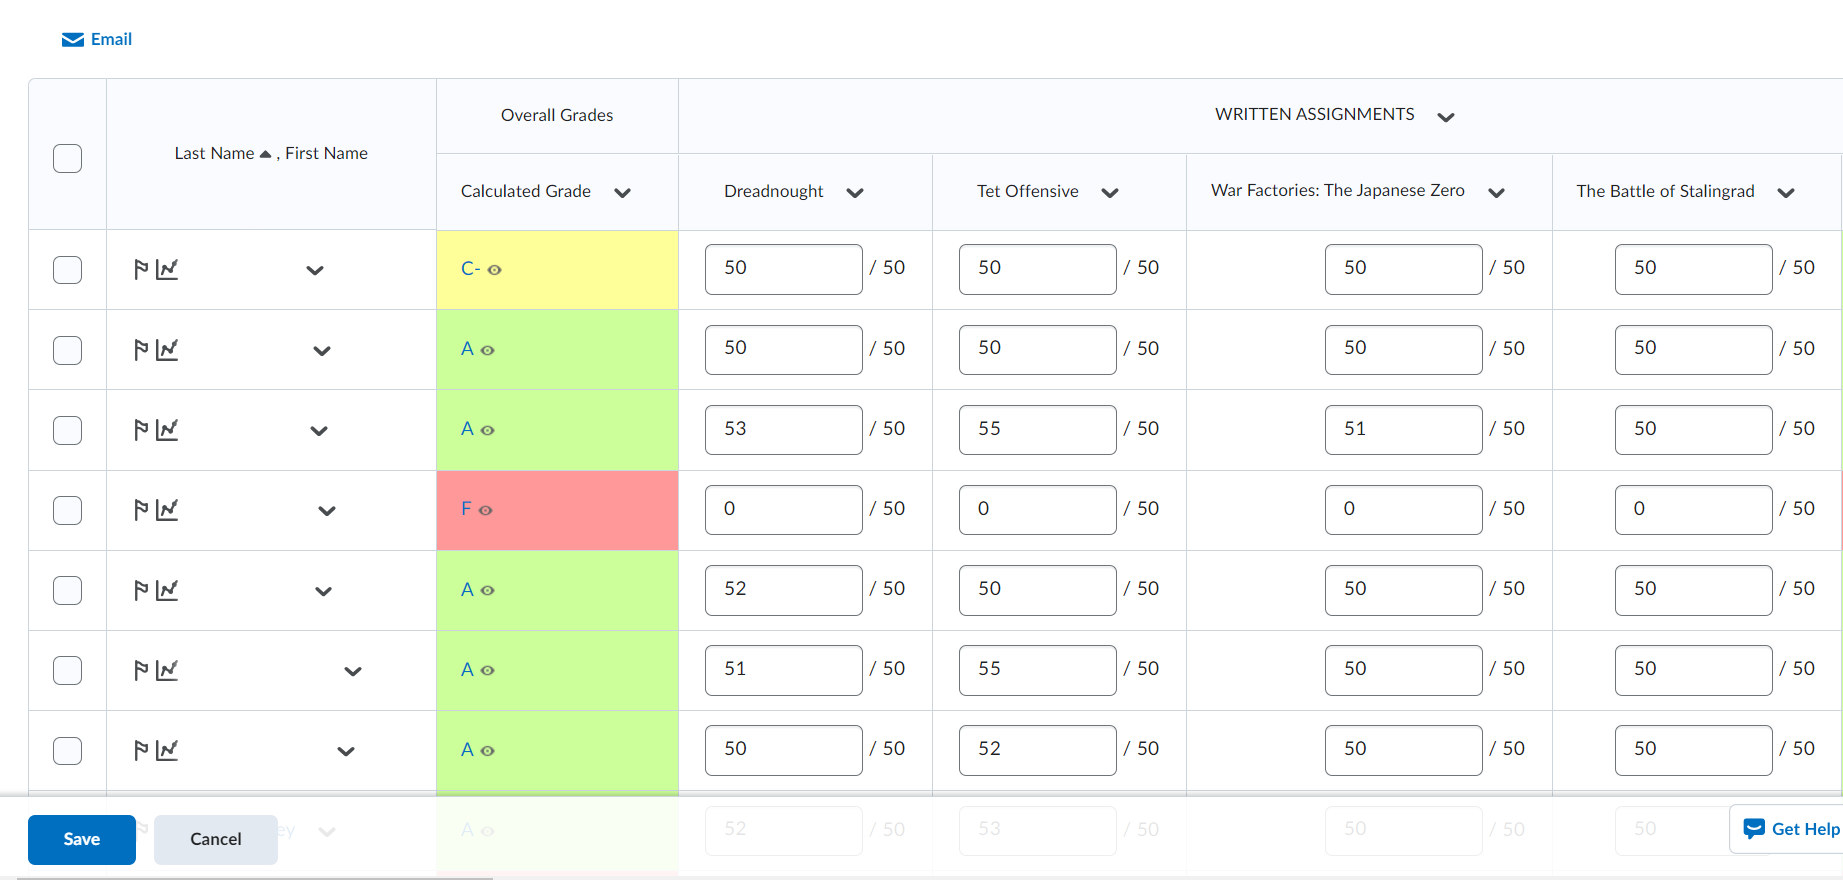
Alternatively, you can click on “Switch to Spreadsheet View” on the Enter Grades page – useful when you have several scores ready to enter.
Grading Student Submissions
Most Content Topic grading is done from the Content Topic itself, but you can also view and grade submissions from the Enter Grades screen. If there is a student submission, you’ll see an icon in the corner of the grade column. Click on that to view submissions and enter grades.
[VIDEO CONTENT FORTHCOMING]
Final or Cumulative Grades
Releasing Final Grades
Final, or Cumulative Grades, are automatically set to release by default. You can check under the Setup Wizard settings (Step 2) to see if your Final Grade is set to automatically release.
Please note that if you have a Grade Book already set up, you can find settings under the Grade Book Settings in the Calculation Options tab.
If this box is not checked you may have to manually release final grades. When you are ready to release grades, go to Manage Grades > Final Grade (called “calculated Grade”) > “Enter Grades.” Click the action arrow [V] associated with “Overall Grades” grades and select “Release All” from the dropdown menu. Alternatively, you can check the box in the “Release/Unrelease” column, or select all the students on the list and click the “Release/Unrelease link.
Creating a Calculated Grade Column
If you prefer not releasing the Final Grade column until the end of the semester, a workaround is creating a Calculated Grade column that includes all of your assignments. This will show students their overall grade which automatically updates when new grades are added. However, if you add new Assignments, you will need to edit the Calculated Grade item to ensure they are added into this column.
-
- From Manage Grades, click the New button and then select “Item”
- From the options list “Calculated”
- Enter a name and select all your assignments (recall that if an assignment is added later, you must add it because new Grade Items are not incorporated automatically)
- Click the Save button; note that this Calculated Grade Item will NOT count towards the Final Grade and it cannot be added to a Category
Rubrics
Rubrics can be used to grade and/or supply feedback. Rubrics can be created under Course Admin > Assessment > Rubrics and can be applied to any graded course activity.
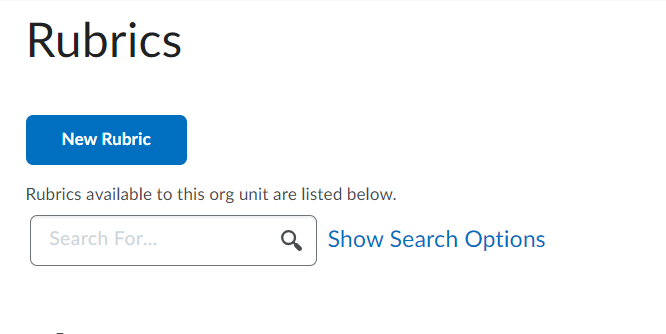
Creating Rubrics
To create a new rubric, click on the New Rubric button.
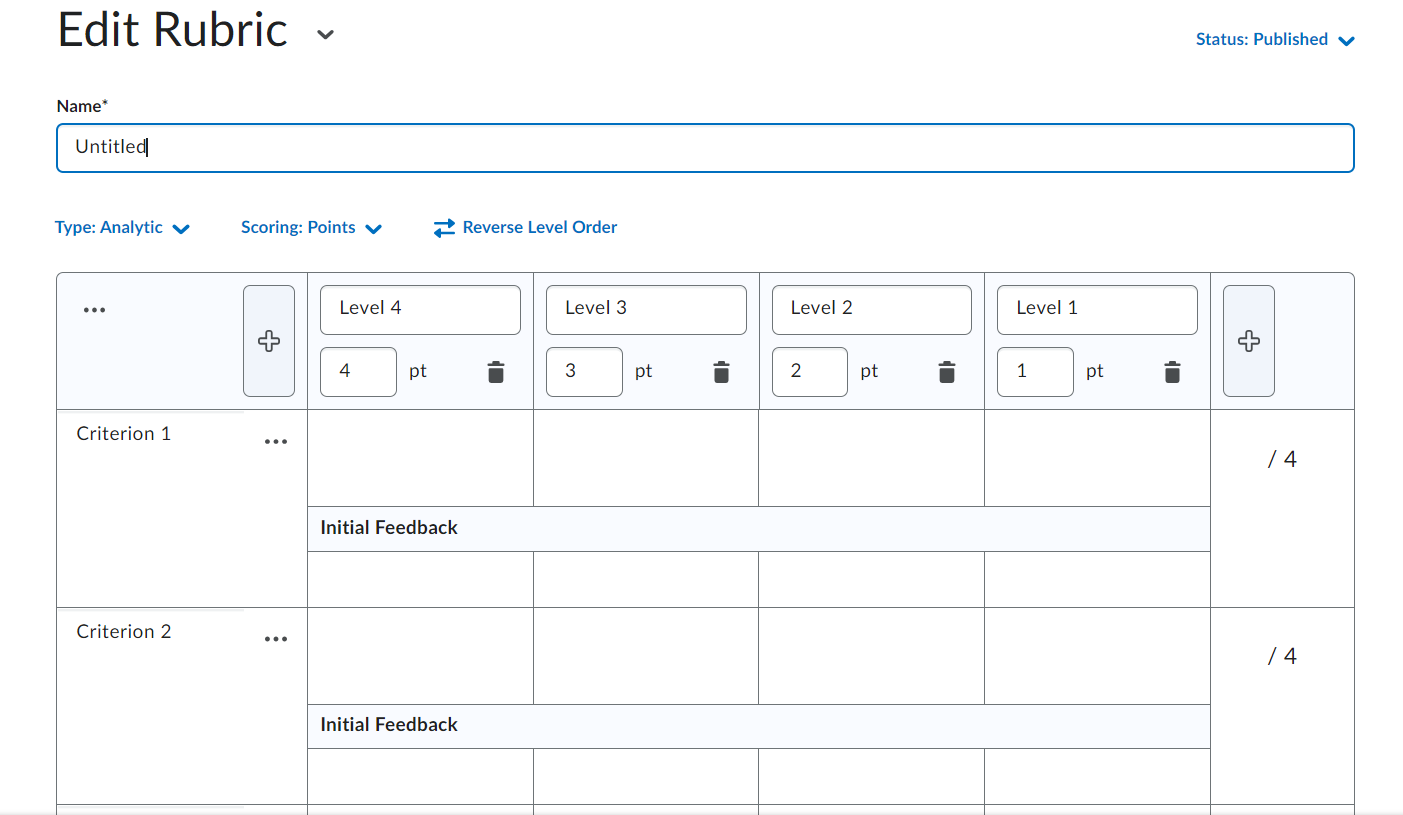
Rubric settings include:
- Status: determines a Published, Archived, or draft version
- rubric name, Level labels and Criteria, Feedback and point values. Columns can be deleted by clicking on the trashcan icons
- Type: Holistic or Analytic. Holistic removes point values for the individual criterion and calculates an overall score based on customized achievement levels; Analytic is the standard multi-criteria and multi-leveled scoring rubric
- Scoring: No Score, Points, Custom points sets the nature of the point scale. “No Score” may be applicable for rubrics providing feedback as opposed to scores
Applying Rubrics to Graded Content Topics
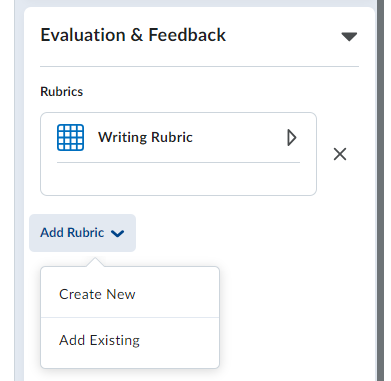
Rubrics can be applied to Content Items (Quizzes, Assignments, Discussions) as well as Grade Items. In this example a rubric is applied to an Assignment.
Go to Course Admin > Assessment > Assignment. Click the Evaluation & Feedback tab and then the “Add Rubric” link to select a rubric you have already created (“Add Existing”). Select the correct rubric and click the Add Selected button. Note that in order for a rubric to be attached to an item it must be published.
[VIDEO CONTENT FORTHCOMING]
Gradebook Settings
To access the Grade Book settings, click the “Settings” link in the upper right hand corner of any page in the Grades area.
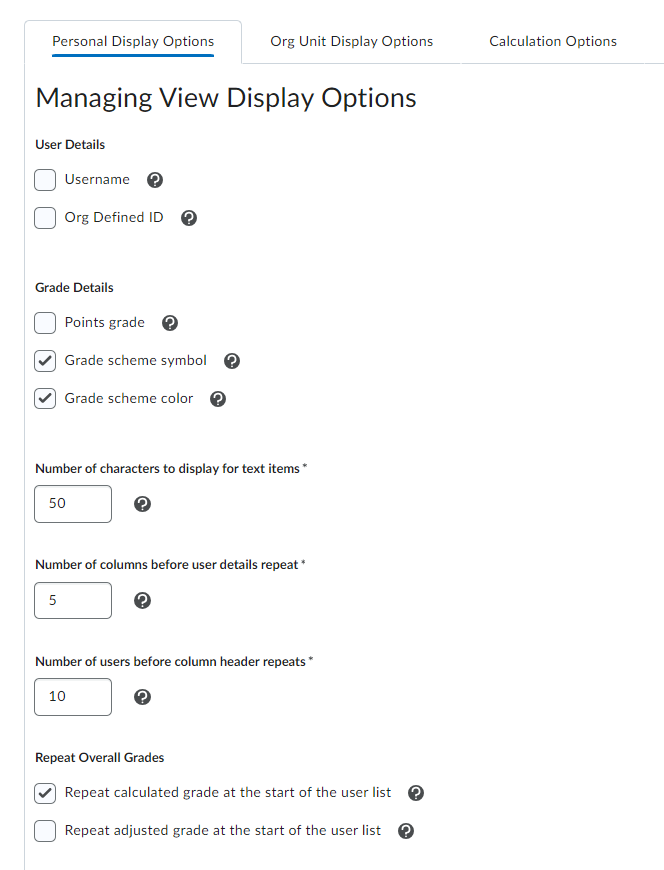
The “Personal Display Settings” tab customizes the instructor’s Grade Book view using the following options:
-
- User Details: displays a student’s username and/or Org Defined ID (k #)
- Grade Details: shows the Points Grade, Grade Scheme Symbol (letter grade/percentage), and/or Grade Scheme Color. If you have a points-based Grade Book, you may want to show “Points Grade” so students can see the total points possible in addition to what they earned (this is not the default setting)
- Number of characters to display for text items: applies if you have text items in the Grade Book
- Number of columns to display before user details repeat: a student’s name and other data selected under “user details” repeats after a set amount of columns to reduce scrolling
- Number of users before column header repeats: column names, or Grade Items, display after a set amount of users to limit scrolling
- Repeat Final Grades: shares the Final Grade column after the user list
- Start Page: by default, clicking on “Grades” takes you to the “Manage Grades” page; many instructors adjust this to go directly to the “Enter Grades” screen
The “Org Unit Display Options” tab specifies the course view options, including a student’s view using the following options:
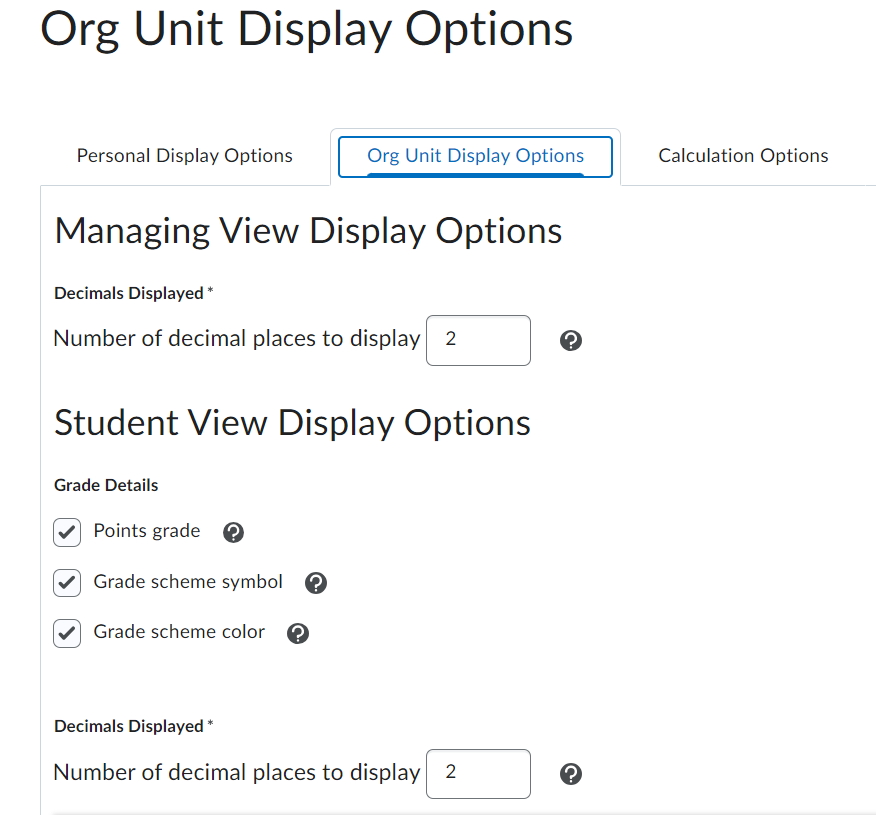
-
- Decimals Displayed: determines how many decimal places should display in an instructor’s view
- Student View Display Options: “Points Grade” shares point totals for individual assignments; “Grade Scheme Symbol” displays letter grades / percentage (depending on your scheme); “Grade Scheme Color” color-codes grades for students
- Decimals Displayed: determines the number of characters and decimal places for a student’s view
- Final Grade Calculation: shows students which assignments count towards the Final Grade and any other important calculations (such as the weighting of categories); if this box is not clicked students jus see letter grades, points, or percentages (based upon the scheme selected)
The “Calculation Options” tab adjusts the Grade Book settings set up in the Setup Wizard. For instance, if you want to change your Grade Book from points-based to weighted, or vice versa, you can make that change in this tab. Final Grade release conditions and Grade Calculations can also be updated.
In the case of Ungraded Items, Talon calculates grades based upon the actual work students have completed. Therefore, if a student does not complete an Assignment, it does not count again them unless a zero is entered in the Grade Book. Best practice is to keep the “Drop Ungraded Items” setting clicked or students will see zeros for all their work, including those not yet assigned. At the end of the semester, it is recommended to select “Treat Ungraded Items as 0” and enter zeros for missing assignments.
Grade Schemes
Talon has three default grade schemes: Percentage, Complete, Kirkwood Master (No Rounding), and Kirkwood Master (Rounding up). Instructors can create their own grade scheme if desired.
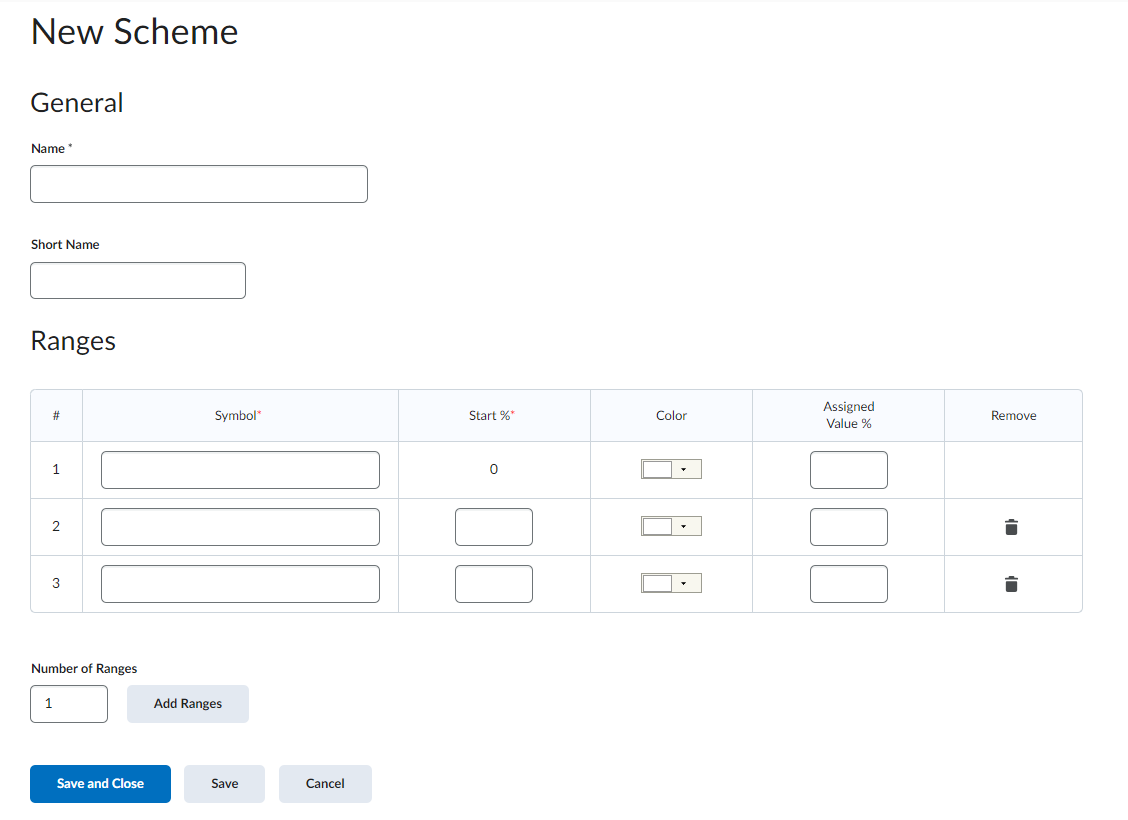
Creating a New Grade Scheme
Individual Grade Schemes can be customized by percentage point, color, and the “symbol” or name of the grade itself.
As an example, for creating a Pass/Fail Grade Scheme:
-
- Visit Grades > Schemes and click the New Scheme button
- Set the Grade Scheme up as desired with the appropriate percentages for a pass or a fail (for example, 100% may be a pass and 99% of lower is a fail)
- Click the Save and Close button so the Grade Scheme can be added to a Grade Item
- To add the Grade Scheme to the Grade item click “Edit” when in the Grade Item
- Scroll down the Scheme and chose Pass/Fail from the dropdown menu; click the Save and Close button
Grades: Student Views
The easiest way for students to check their grades in Talon is by clicking on the Grades link in the Navbar.
This takes them to their grade report where they can view their overall grade, individual grades, and comments. You’ll want to direct students to the Progress link the Navbar to view specific, detailed feedback on Assignments and Quizzes.
On the Progress landing page, students can see their progress summary, grades, feedback, and progress regarding the completion of specific Content Items, such as Assignments, Quizzes, and Discussions.
The links in the left hand column move amongst different Progress pages; this is also where instructors can view what students are clicking on in the course.
Weighted Grade Books
In a Weighted Grade Books categories are weighted by percentages.
Setting Your Grade Book System to Weighted
A Grade Book can be set to weighted via either the Grade Book Setup Wizard or through Gradebook Settings. To do this category weights and settings must be adjusted.
Categories are shaded in gray on the Manage Grades page. Click the action arrow [V] next to a category name and click “Edit Grade Item.”
Category weights can now be set.
Under “Distribution” check “Distribute weights by points across all items in the category.” If this setting isn’t checked, you’ll have to manually calculate the weights for individual assignments and you’ll receive an error message if the Assignment weights don’t add up correctly.
If you are dropping the lowest number of items from within a category you’ll need to check the last box and distribute the weights evenly for all items.

Display Options
In a weighted Grade Book you’ll have the extra option of displaying the “weighted grade” in your Grade Book for both the instructor and student view under the Grade Book Settings. Unless you have this previously adjusted, the weighted grade will likely display as default. This can be a bit confusing for instructors and students as a 10-point assignment score may show as a decimal. so if you do choose to display a weighted grade, it might be helpful to communicate that with students.

Calculation Error Messages
If your weighted totals don’t add up to 100%, you may see a warning message at the top of your Manage Grades page.
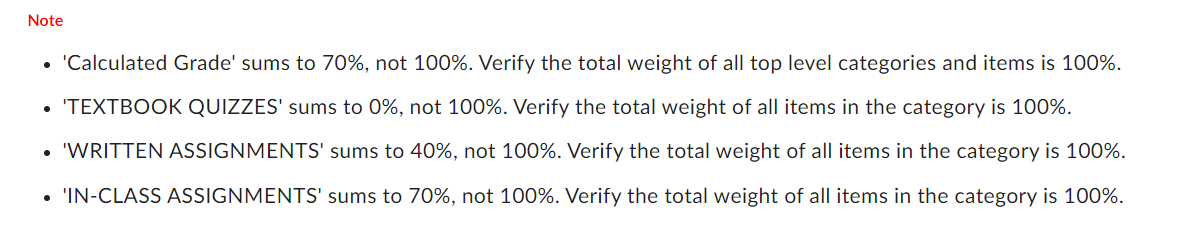
Do not ignore this message! If these errors are not addressed, your weighted grades will not calculate properly. Be sure to review your settings so they sum up correctly.
Associating and Deleting Items
Associating Grade Items: Option A
Click Course Admin > Assessment > (Assignments, Quizzes) or Course Admin > Communication > Discussions and then . . .
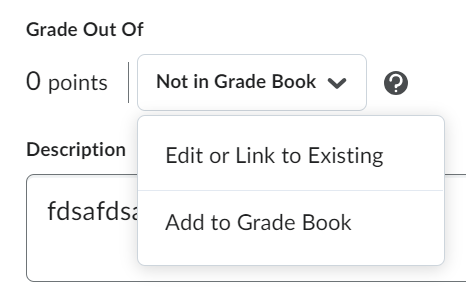
Assignments: if using the New Assignment Builder, type in the total points possible value; click the “Not in Grades” option; click “Add to Grade Books” and then save and close.
Discussions: click the Upload/Create button and from the dropdown menu choose “New Discussion”. Determine a Topic Title, total points possible, and provide a Description. If you want to change the Forum (Category) the Discussion Topic is in, click “Change Form” to create a new one or select from an existing one. Once finished, click the Save and Close button.
Quizzes: click Course Admin > Assessment > Quizzes. For the Quiz you wish to associate click on “Edit Quiz” and choose the “Assessment” tab in order to have the dropdown menu to add a Grade Item.
Associating Content: Option B
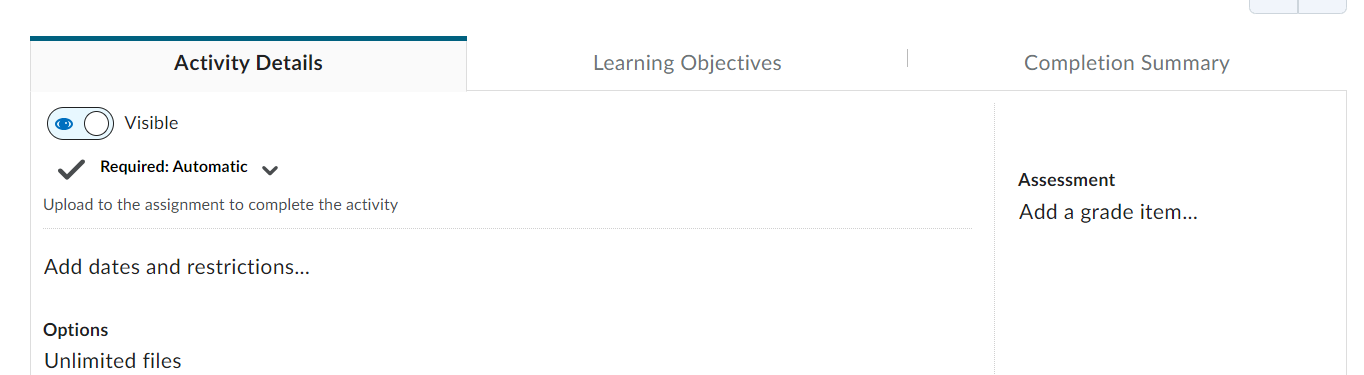
Click in the Course Content > Module > and click on the Content Item. Scroll to Assessment section and click on “Add a grade item . . . “; click on the plus sign to add a new Grade Item. Select the newly-added Grade Item from the dropdown menu and click the Save button.
Deleting Grade Items Associating with Tools
Talon has a “fail-safe” for avoid a the mistaken deletion of a Grade Item associated with a tool (Assignment, Quiz, Discussion) by preventing the Grade Item from being deleted until the content association is broken. Breaking this association is a two-step process.
Step 1: Removing the Grade Item from the Content item
Option A: Course Admin
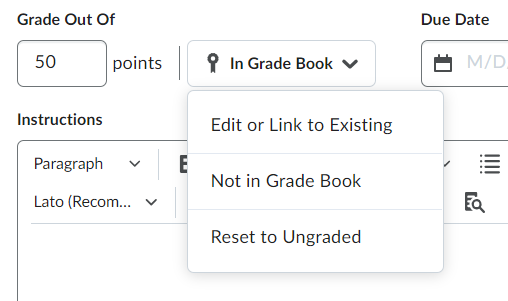
Assignments: if using the New Assignment Builder, click the “In Grade Book” dropdown menu and choose “Not in Grade Book”; save and close.
Discussions: choose the dropdown menu next to the Discussion Topic to “Edit Topic.” Click the “Assessment” tab and select “Choose a grade item”; save and close.
Quizzes: follow Course Admin > Assessment > Quizzes and choose the dropdown menu next to the appropriate quiz to “Edit Quit”. Click on the “Assessment” tab and in the Grade Item dropdown menu select “None”; save and close.
Option B: Course Content
Click on the Course Content link in the Navbar and select the appropriate Module; within the Module click on the Content Item.
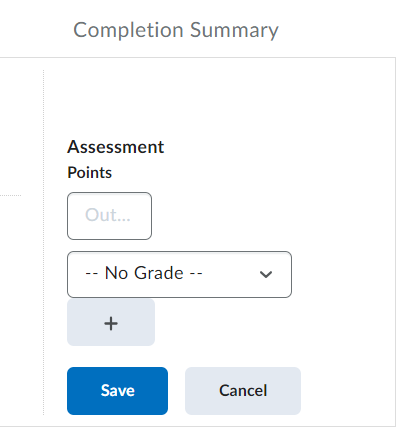
Go to the Assessment section and select “No Grade” from the dropdown menu; save and close.
Step 2: Deleting the Grade Item
After the Grade Item is no longer associated with a tool, you can delete it in the Grades tool by visiting the Grades link in the Navbar and going to “Manage Grades.” Click the More Actions button and select “Delete.” Then scroll down the list to select those Grade Items you want to delete; click the Delete button.
Bonus Items (aka Extra Credit)
Any Grade Book Item can be for extra credit = marked as a “Bonus” Item. Bonus Items are calculated differently, depending upon how a Grade Book is setup.
Bonus Items in Points Grade Book
Set the Bonus Grade Item to the maximum number of points possible and designate it as bonus by clicking on the “Bonus” checkbox.
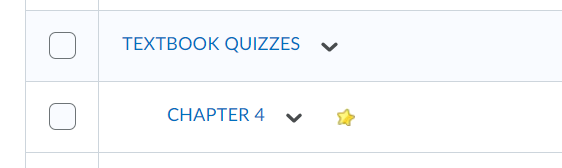
A gold star placed next to the Grade Item in the Grade Book indicates the Grade Item is “bonus.”
It is also important to select the checkbox for “Can Exceed” in the Category in which the Bonus Grade Item is found for properly calculating the overall Calculated or Adjusted grade.
Bonus Items in a Weighted Grade Book
Bonus Items in a weighted Grade Book are a little tricky!
You can place Bonus Items within a Category or make them contribute towards the overall grade total (not a Category). If you place a Bonus Grade Item in a Category, it contributes toward the weight of that Category. So, if the Category is weighted at 25%, and a student receives 100% on all assignments in this Category, and there is also a Bonus Item present (weighted at 1-0%), the student would receive 110% for the category (27.5 instead of 25).
Just like in a points-based Grade Book, the “Allow Category Grade to exceed category weight” option must be checked, unless you don’t want a student to be able to earn over 100% within that Category.
You may also place a bonus item in the Grade Book that is not included in a Category. This add towards the overall course total, so you will want to set the weight considerably lower, as high weight can inflate a student’s grade. For example, if a student is earning a 90% overall in the class, and there is a bonus item in the Grade Book (not in a Category) with a weight of 10, this will add 10 percentage points to the student’s “Final Calculated Grade,” giving them 100% in the course. To match the previous example within the Category, the weight outside all Categories would need to be set to 2.5. Please note that when creating a Bonus Grade Item its weight must be set higher than zero in order for it to count towards a student’s grade.
For assistance with Grade Book issues, visit the Talon Gradebook Troubleshooting visual map!
Publishing Midterm and Final Grades
On the Enter Grades page in Talon (click on the Grades link in the Navbar), click on the Export to Colleague button. Please note that all the grades must be in the form of letter grades (A-F), otherwise you’ll receive an “Invalid Grade Format” error.

After clicking the Export to Colleague button, special grades (P, Q, etc.) can be chosen in place of a letter grade.
If the Talon letter grades need adjustments before you submit them to Colleague, return to your Talon Grades Tool to make the adjustments there before returning to the export process.
Here are the steps to ensure both the Display Setting for students and the Grade Scheme are correct:
Changing the Display Setting for Students
-
- In the Navbar click on Grades and then go to Settings (upper right-hand corner)
- Click the Org Unit Display Options tab
- Under Student View Display options, make sure Grade scheme symbol is checked
- Save any changes
Changing the scheme of the Calculated/Adjusted Grade
-
- In the Navbar click on Grades and then go to Manage Grades
- Click on the Calculated Grade or Adjusted Grade item to edit its settings
- Change the Grade Scheme to your chosen letter grade scheme (either Kirkwood Master option works)
- Save your changes
Checking which Overall Grade you are using: Calculated/Adjusted
- In the Navbar click on Grades and then go to Settings and then the Calculation Options tab
- Under the Final Grade Released section, verify the Grade Item you are exporting to Colleague (most likely, “Calculated Grade”)
- Save any changes
[VIDEO CONTENT FORTHCOMING]
Quick Eval
What is Talon’s “Quik Eval” feature? “Quick Eval” gives instructors a “big picture” view of student submissions (assignments, quizzes, and discussion) – both those ready for evaluation and those in a “draft status.” It also offers filtering options (for instance, by assignment name or course).
Quick Eval Widget
To add the “Quick Eval” widget to a Talon homepage:
- Enter your Talon shell > Course Admin > Homepages
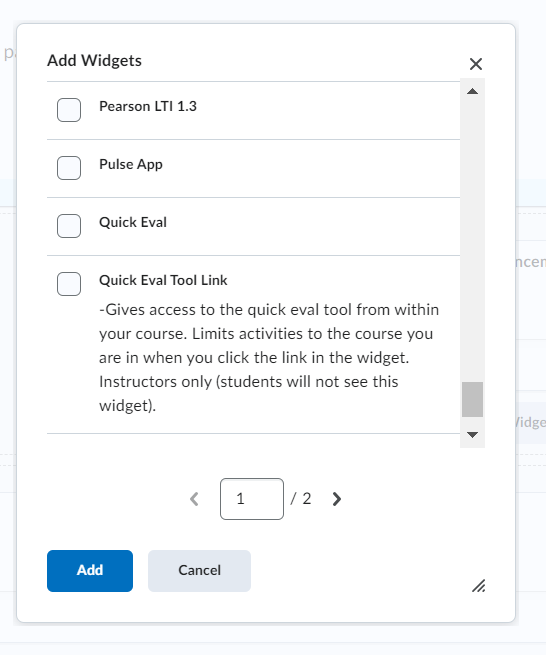
- Click on the active homepage link > click on the Add Widgets button to place the widget on the page
- Select “Quick Eval Tool Link” from the Custom Widget list > click the Add button
- Return to the course homepage to see the widget; clicking the widget link gives instructors access to the tool/feature

Quick Eval User Page
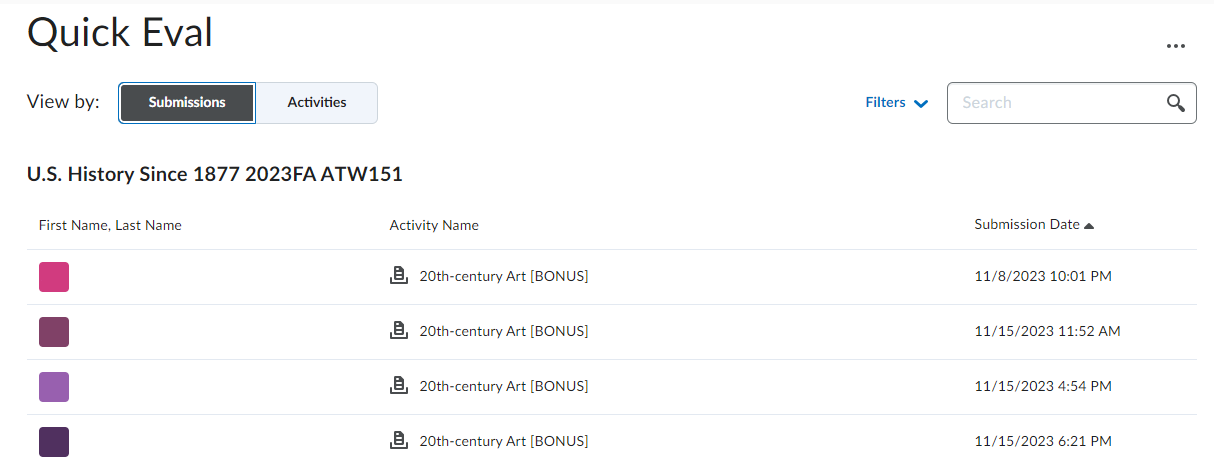
- View by: Submissions: Shares a dashboard of submissions organized by individual learner
- View by: Activities: Shares a dashboard of submissions organized by individual assignment
- · · · = Options for Quick Eval: Provides a dropdown menu for selecting either “Dismissed Activities” or a “Multi-Course Quick Eval”
- First Name, Last Name: Full names of the enrolled students
- Activity Name: The assignment name
- Submission Date: When a learner submitted their project (this feature can be toggled in order of earliest or latest submission)
Quick Eval User Page – Submissions View Functionality
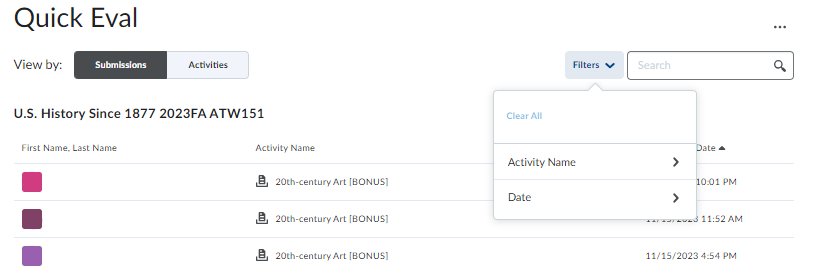
In the Submission View:
- Clicking on a student’s name takes instructors to the projects (one at a time, not a list view) still needing to be evaluated
- o The “Overall Grade” and “Overall Feedback” an instructor provides can be published (Publish button) or saved as a draft (Save Draft button)
- o Any information saved in draft form can be released later – simultaneously across the course – via options associated with the Activities view (see below)
- The Filters dropdown menu means submissions can selected and then re-organized by the name of the project (Activity Name) or by the time frame (Date) in which was turned in: Last 24 hours, Last 48 hours, Last 7 days, Older than 7 days.
Quick Eval User Page – Activities View Functionality
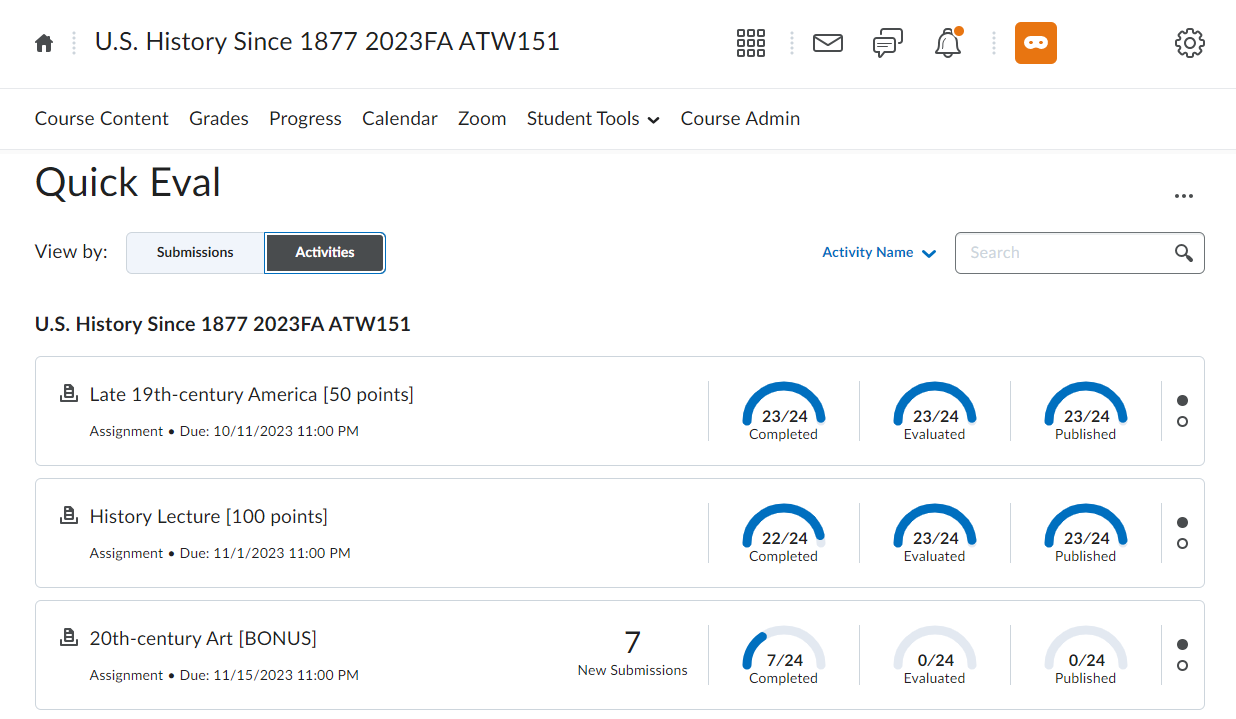
In the Activities View:
- · · · = Options for Quick Eval:
- o Dismissed activities: Instructors can view all the activities they have previously marked as “dismissed”
- o Multi-Course Quick Eval: Instructors can view all the submissions still needing evaluation and/or feedback across all their course offerings

- Activity Name: Clicking on the action arrow [V] shares a dropdown menu of the assignments to be graded in the course
- If the Multi-Course Quick Eval option has been selected, the filter will thus allow for Activity Name and Course selection
Activities Dashboard
In the Standard Dashboard View
- Completed: The total number of student submissions to that point
- Evaluated: The number of evaluated learner submissions to that point
- Published: The number of published submissions to that point

In the Mouse Rollover Dashboard View

- Evaluate All: Takes instructors to the projects (one at a time, not a list view) still needing to be evaluated
- Submission List: Takes instructors to the projects still needing to be evaluated (in a full page list view)
- · · · More Actions:
- o Publish All: Allows instructors to simultaneously publish submissions previously graded and saved as draft versions across the course
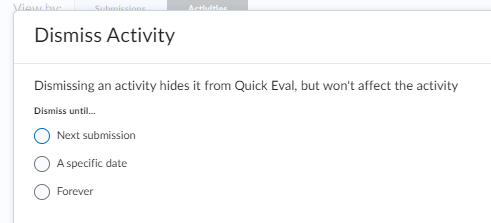
- o Dismiss Until: Hides a student’s submission from the Quick Eval tool as determined by the options = Next submission, A specific date, Forever
- To apply the dismissal, click the Dismiss Activity button at the bottom left-hand corner of the pop up box