
7 Quizzes

Assessment Time = Quizzes
Question Library
While you can add questions to a Quiz as you create it, it’s recommended using the you use the Question Library to create and organize Quiz questions; when creating randomization in a Quiz you will have to import questions from the Question Library.
Questions from the Library can be added to any Quiz, self-assessment, or Survey. For instance, if you have several chapter Quizzes and a unit exam that pull questions from similar chapter Quizzes, having them housed in the Question Library makes it much easier to re-use those questions.
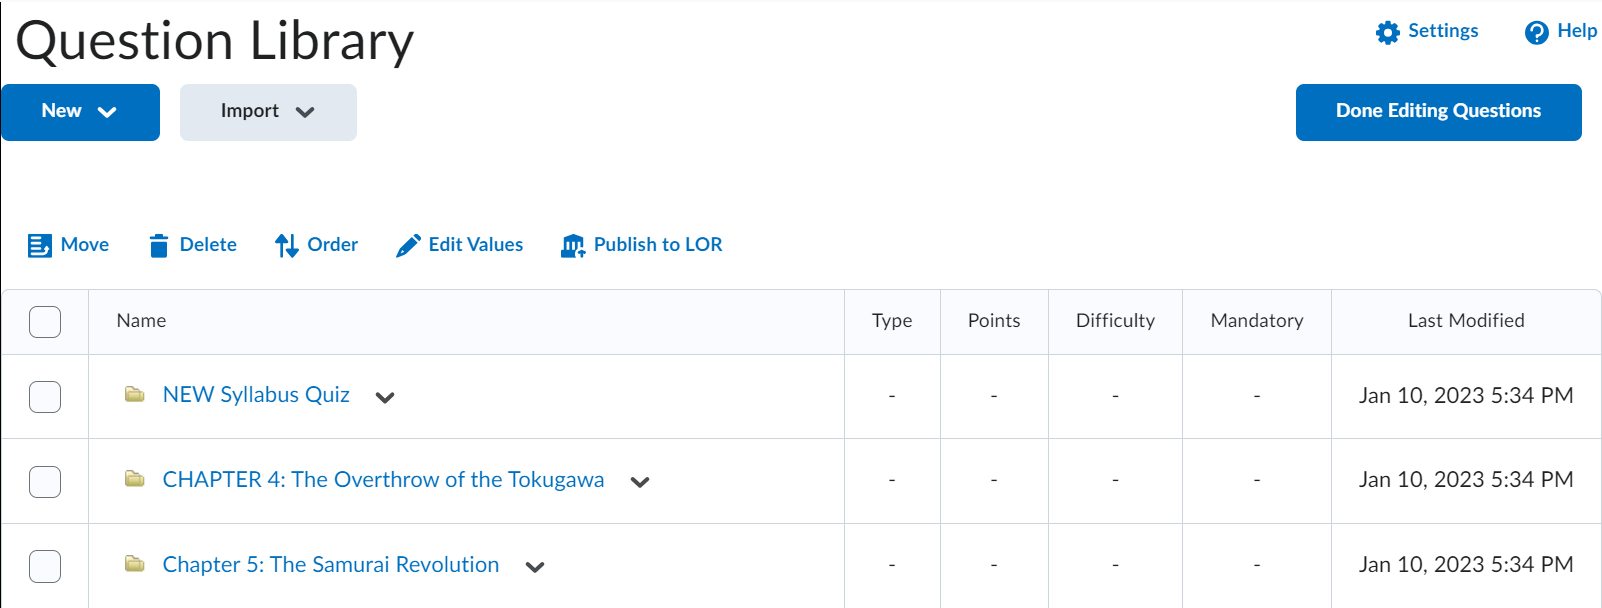
The Question Library can be found under Course Admin > Assessment > Quizzes > Question Library.
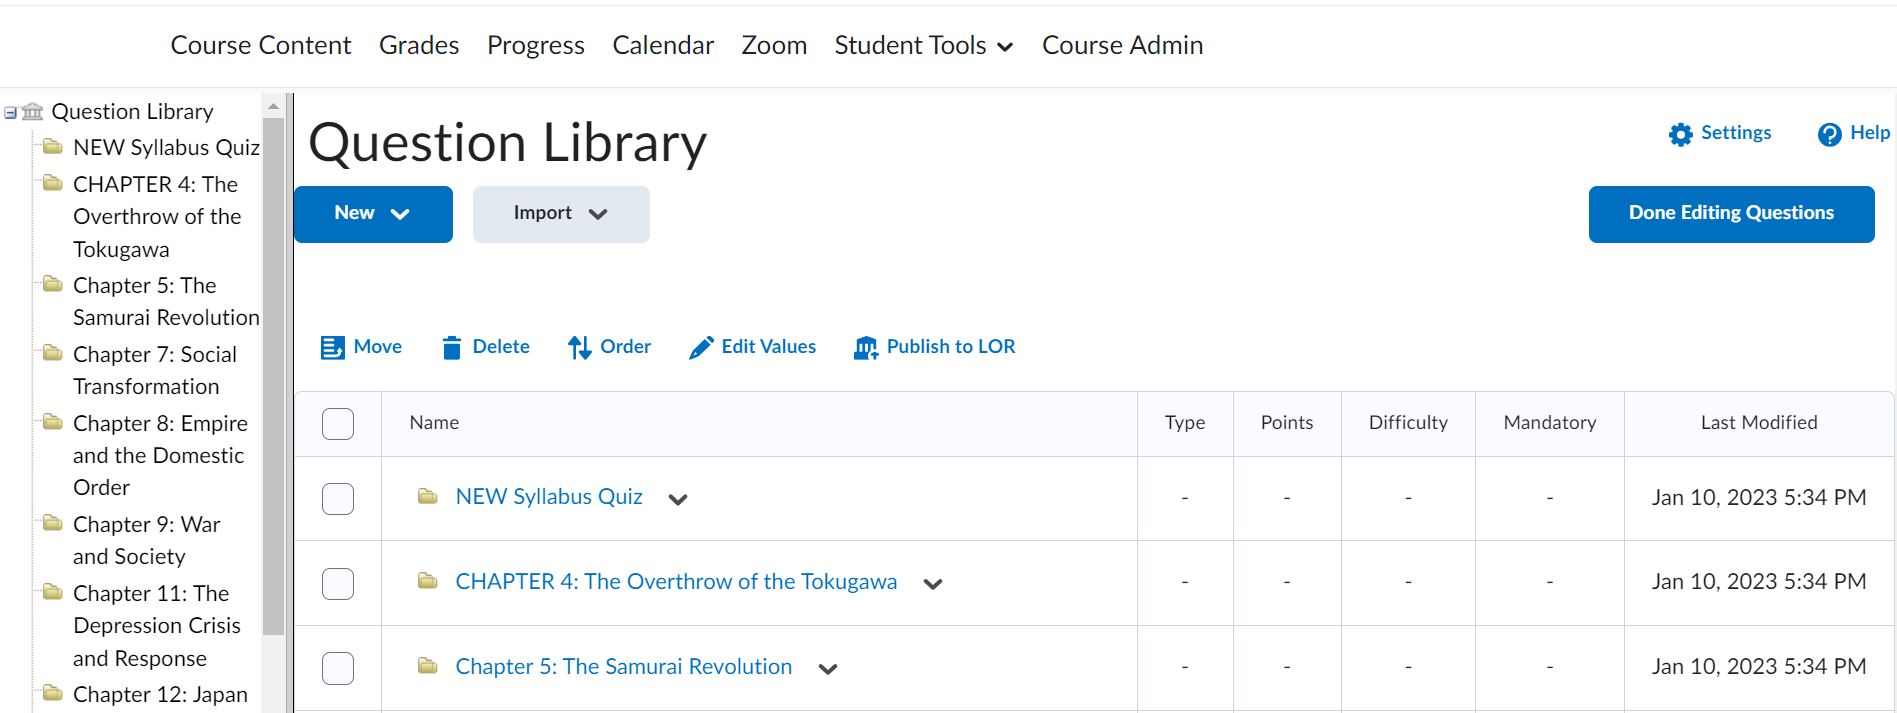
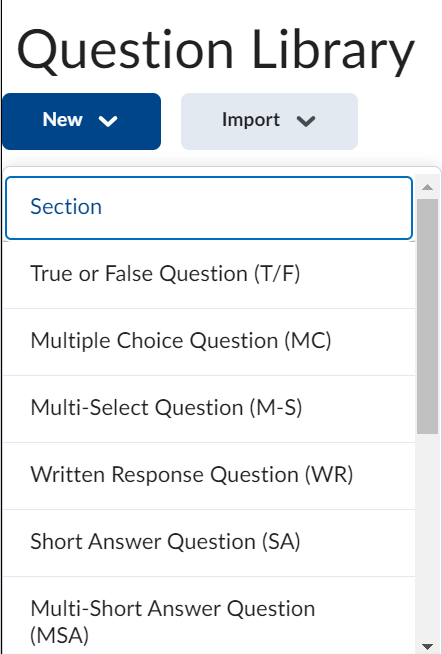
Clicking on the New button lets you add questions.
All question types in Talon are auto-graded except for written responses.
It is recommended you use sections, akin to folders, to organize the Question Library. Creating a section is the first option on the drop down menu associated with the New button.
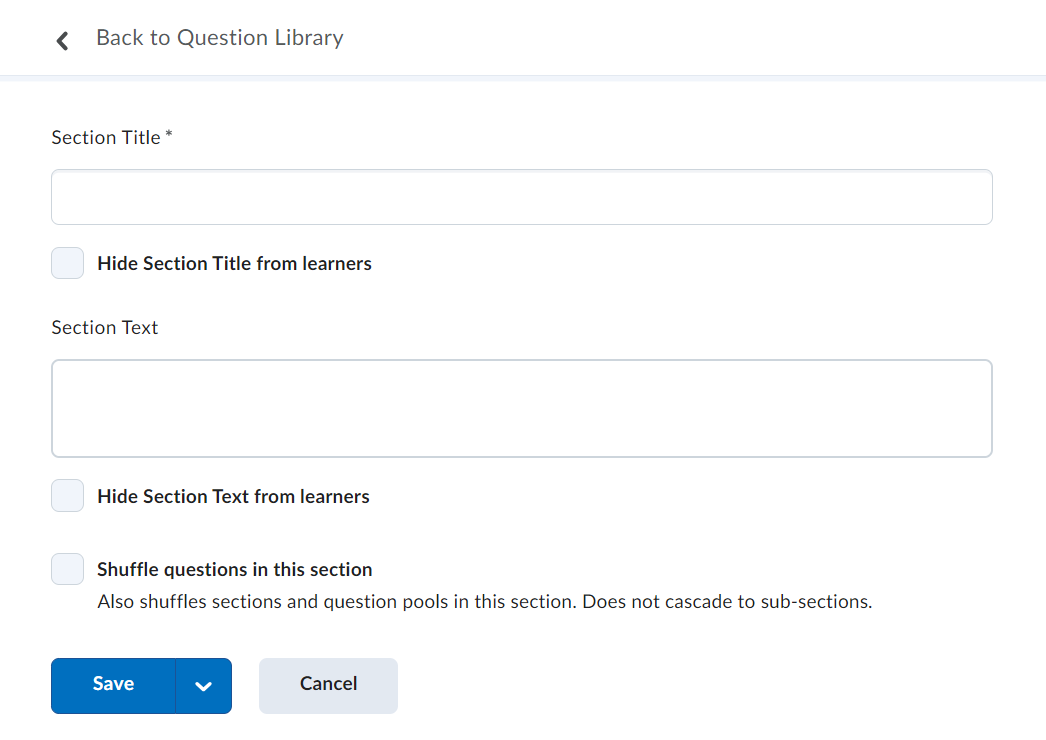
After you’ve created your sections, you can start adding questions; click on a section to open it and then add questions.
Creating Quizzes and Quiz Settings
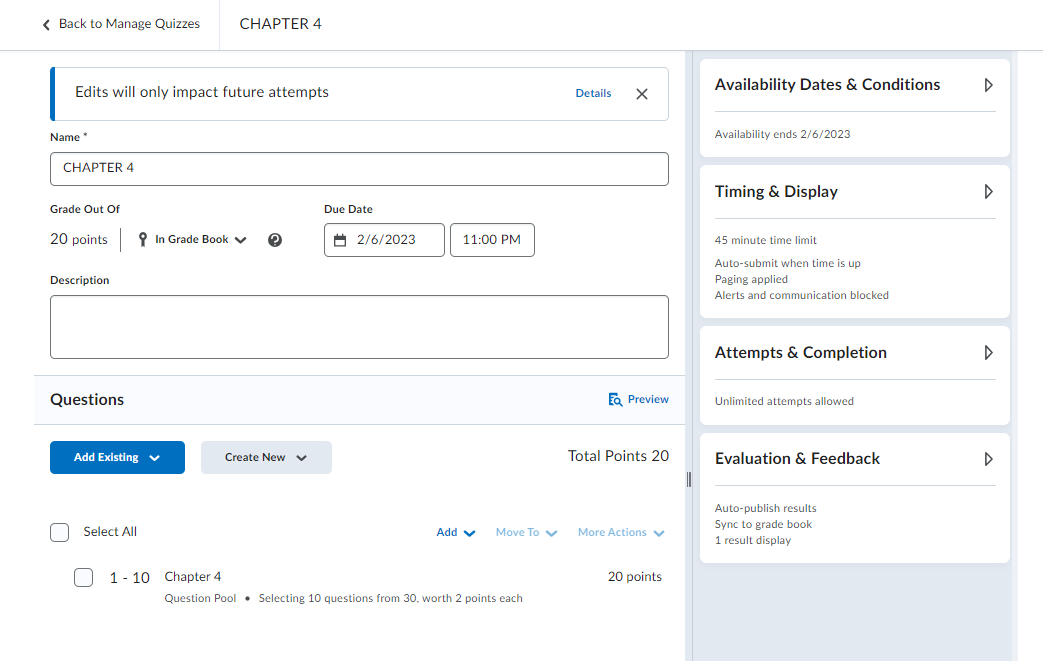
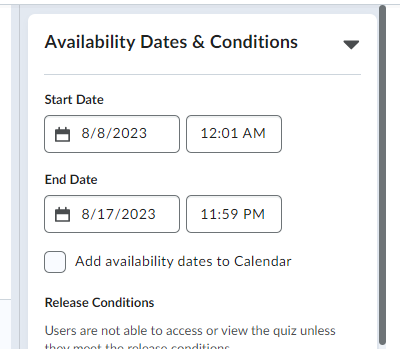
The “Availability Dates & Conditions” tab is the place to start when creating the parameters for delivering your quiz.
Start and end dates, restricting when students can access a quiz, can be set and placed in the Calendar tool. Before the start date and after the end date students cannot open or take the Quiz, but they do have complete access while the assessment is active. Note a set due date on the Quiz does not stop a student from taking the Quiz if no end date is set.
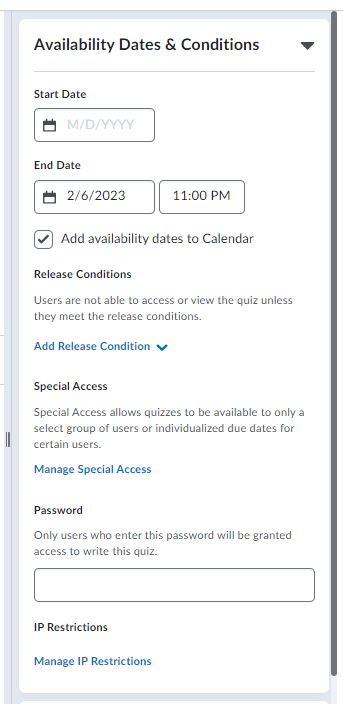
Release Conditions allow you to make Modules and Content Topics visible to individuals or groups of students based on certain criteria or performance conditions. For example, a Module could be locked until a student completes the previous Module’s review quiz and earns an a score of 80% or higher. Or, perhaps a final paper can only be unlocked upon the submission of a Draft #2 assignment.
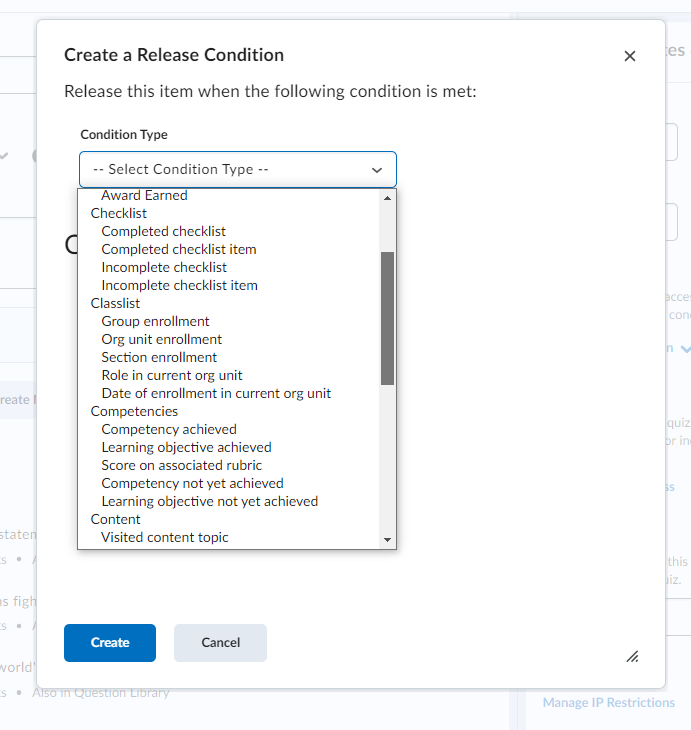
To set a Release Condition, click the “Add Release Condition” link in the “Availability Dates & Conditions” tab. Select the “Condition Type” and then click the Create button.
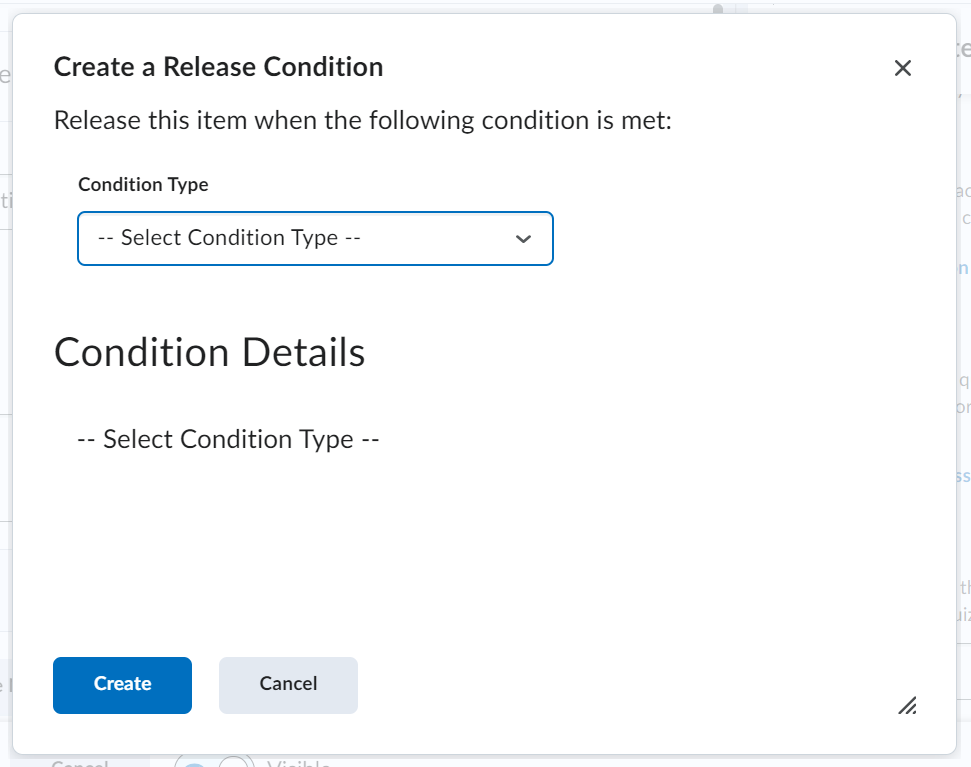
Under the “Condition Type,” for this example, we’ll select “Score on a quiz.”
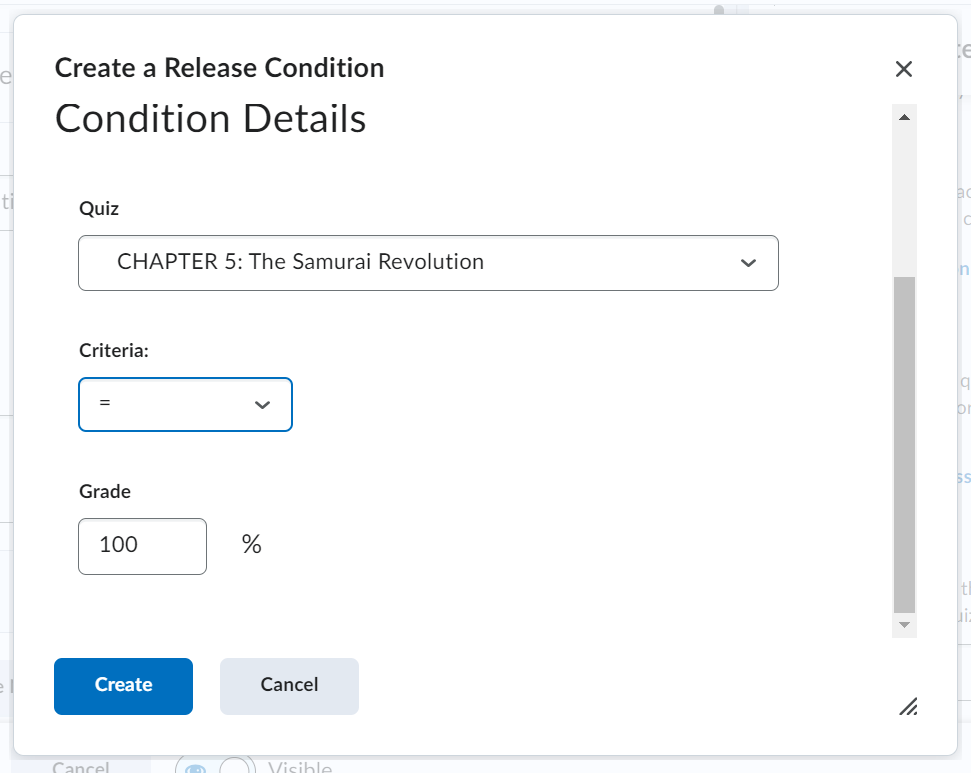
Select the Quiz, the required criteria, and the grade (for this example, we chose “Chapter 5: The Samurai Revolution” and and 100%). Click the Create button. In this case, students will not be able to access another Assignment until they earn a 100% on the Chapter Quiz.
There are a few key considerations to keep in mind:
-
- students will not see the release condition and the content will not be visible to them, so you will need to explain what they need to do to make the content visible
- make sure to avoid circular conditions (Assignment 1 must be completed before Assignment 2, but Assignment 2 must be completed before Assignment 1), or neither assignment will ever be visible
- when a student meets a condition, they have met the condition – there is no way to reset it!
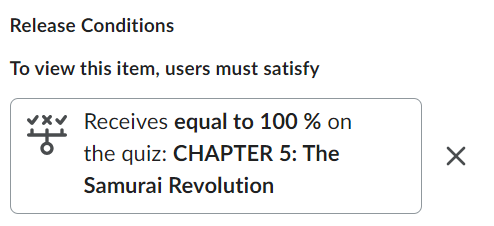
- if an item has a release condition associated with it, the following information appears for the instructor only
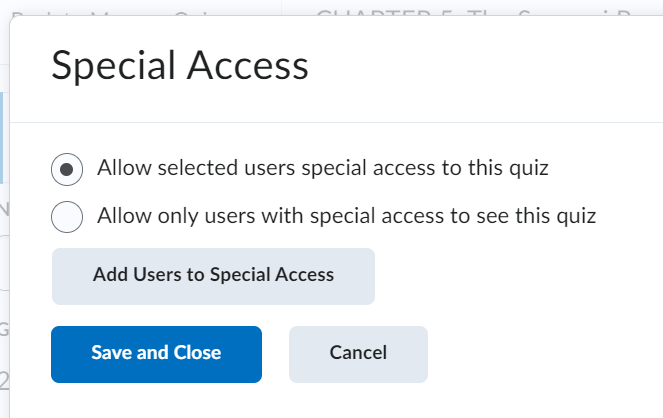
The Special Access settings can be applied to students needing extra time on a quiz, or perhaps an extension on a end date. Click “Manage Special Access” link to customize your access settings.
The “Availability Dates & Conditions” tab has a few security options as well as parameters for Special Access (when students need to take make ups or have accommodations).
Accommodation settings can be set at the course level for students, and once granted, these accommodations apply to all quiz activities in a course for that learner. Quiz-specific special access can overwrite an accommodation for any user on a Quiz-by-Quiz basis. When you overwrite an accommodation and save that overwrite, a warning describing the impact of overwriting an accommodation appears.
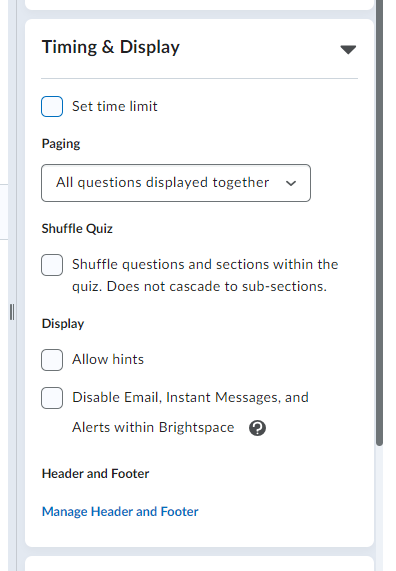
The “Timing & Display” tab provides advanced options regarding restrictions:
-
- Set time limit: the default time limit setting is 120 minutes (which can be changed); Timer Settings allow you to choose what to do “When The Time Limit Expires”
- Paging: determines how the quiz questions appear in the quiz for a student
- Shuffle Quiz: shuffles the delivery order to quiz questions so they are randomized for each student
- Display: provides hints and disables distractions
- Header and Footer: shares particular information the instructor wants students to see at the top (header) and bottom (footer) of each quiz questions page
The “Attempts & Completion” tab:
-
- Attempts: determines how many times a student can take a quiz and which result will be counted toward a student’s grade
- Category: lets you place the quiz within a category in the Grades tool
- Notification Email: allows instructors to receive updates when students access the assessment
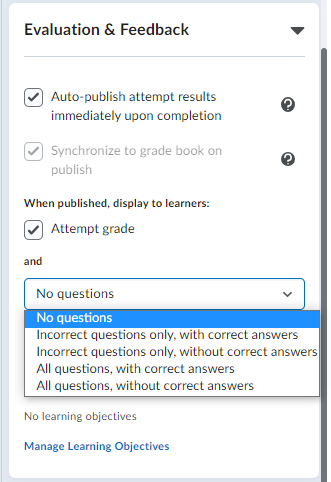
The “Evaluation & Feedback” tab’s features are especially important because they keep students posted on their academic progress in the course. A best practice is to release a grade as soon as an assessment has been submitted by a student. In addition to posting a score, the tab also allows instructors to determine what elements of a completed Quiz a student can see.
Adding and Editing Quiz Questions
While it is recommended to use the Question Library for adding questions some Quizzes can be created more easily adding questions directly into the Quiz itself. Or, if you have used the Library, you can import questions from the Library into the Quiz.
Adding Questions to a Quiz
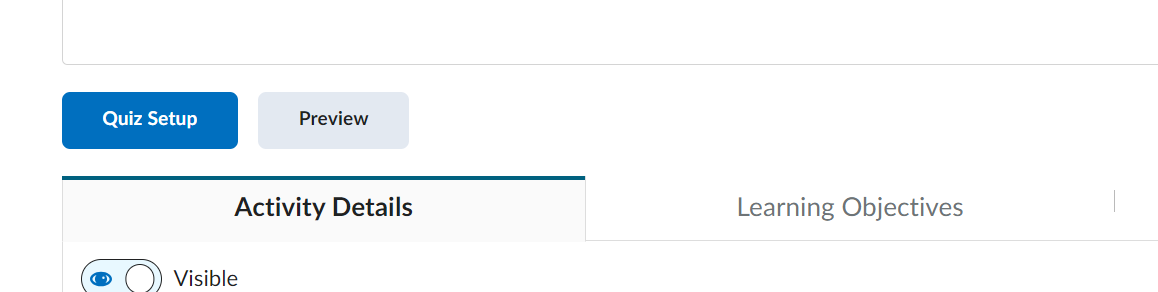
Go to your quiz and click the Quiz Setup button.
On the landing page, click on the Create New button.
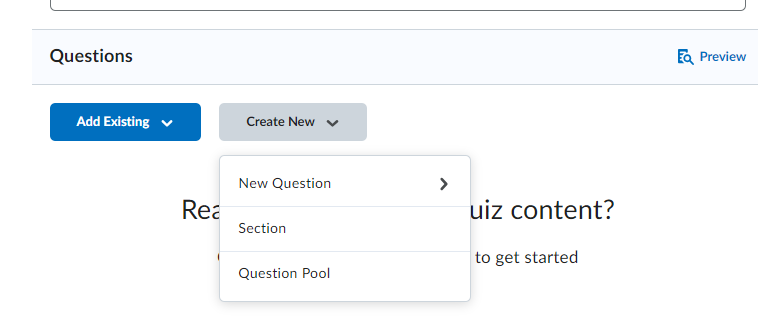
From the dropdown menu the following options appear:
-
- New Question: offers the type of new question you want to add to the quiz
- Section: creates a question bank section within a quiz
- Question Pool: creates a pool of questions from which a random number of questions can be chosen
The options associated with new questions are as follows:
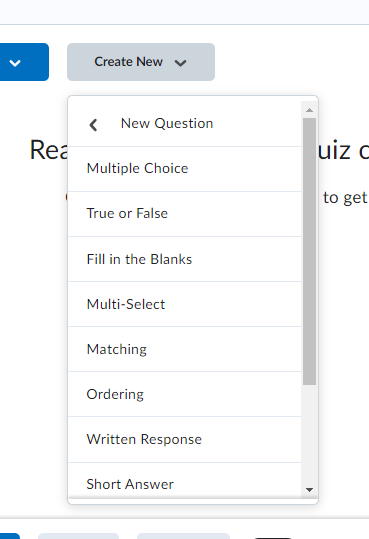
-
- Multiple Choice (MC): adds a question and students choose the best answer (auto-graded)
- True or False (T/F): provides option for either True or False (auto-graded)
- Fill in the Blank (FIB): allows for blanks to added to the question and students enter a word or phrase (auto-graded)
- Matching (MAT): allows for a list of answers and a list of prompts; students match the answers to the prompts (auto-graded)
- Ordering (ORD): allows for students to put several items in an specified order (auto-graded)
- Written Response (WR): allows for the use of an essay or other long answer question. This question type is NOT auto-graded.
- Short Answer (SA): allows for a word or phrase answer (auto-graded)
- Arithmetic (2+2): allows you to create basic arithmetic problems where the numerical values in the problem are randomly generated (within your set parameters) by the computer.
- Significant Figures (x10): allows you to create basic arithmetic problems where the numerical values in the problem are randomly generated by the computer and where the answer needs to be written in scientific notation with the correct number of significant figures.
- Multi-Short Answer (MSA): allows for multiple word or phrase answers (auto-graded)
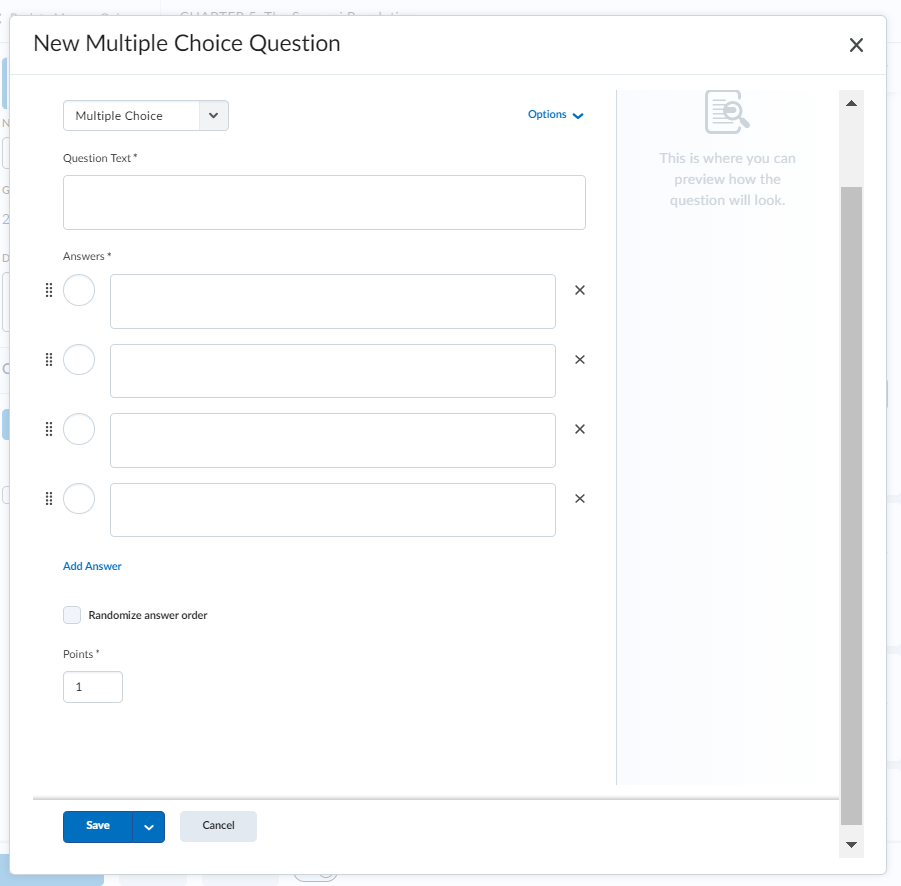
For this example, we will add a multiple choice question; choose “Multiple Choice” from the menu. Type your question text and your answer choices; choose the correct answer by checking the box on the left hand side. If you need more answer options, choose “Add Answer.”
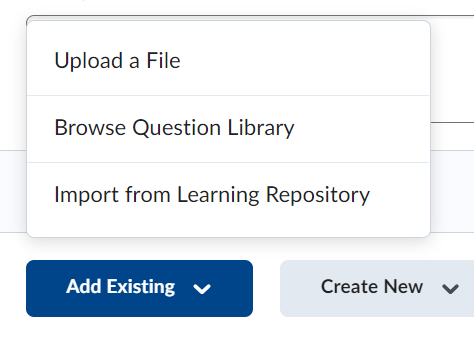
Importing from the Question Library
If you built your questions in the Library, you can import those into a quiz = click on the Add Existing button and select “Browse Question Library.”
Browse the Question Library and select the questions you want to add; then click the Import button to upload them into a Quiz.
Adding a Bonus Question to a Quiz
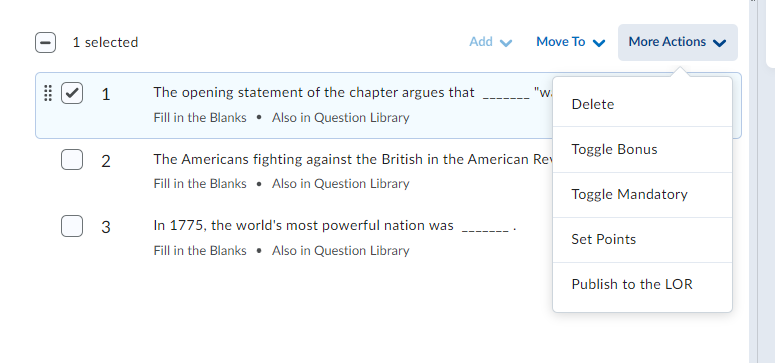
Build the questions as shown above and then on the Quiz properties page:
-
- Select the question(s) you want to make extra credit
- Click the More Actions button
- Select “Toggle Bonus” from the drop down menu
[VIDEO CONTENT FORTHCOMING]
Adding Videos in Quizzes
Adding a video clip to a Quiz is possible using the Video Note tool.
1. Open the Quiz in which you want to embed the video clip
2. Click on the question in which you want to embed the video clip
3. In the HTML editor in the text area associated with the question, click on the Insert Stuff icon and choose “Add Video Note”
4. There are options for adding videos: you can record a video (30 minute limit) or upload a file
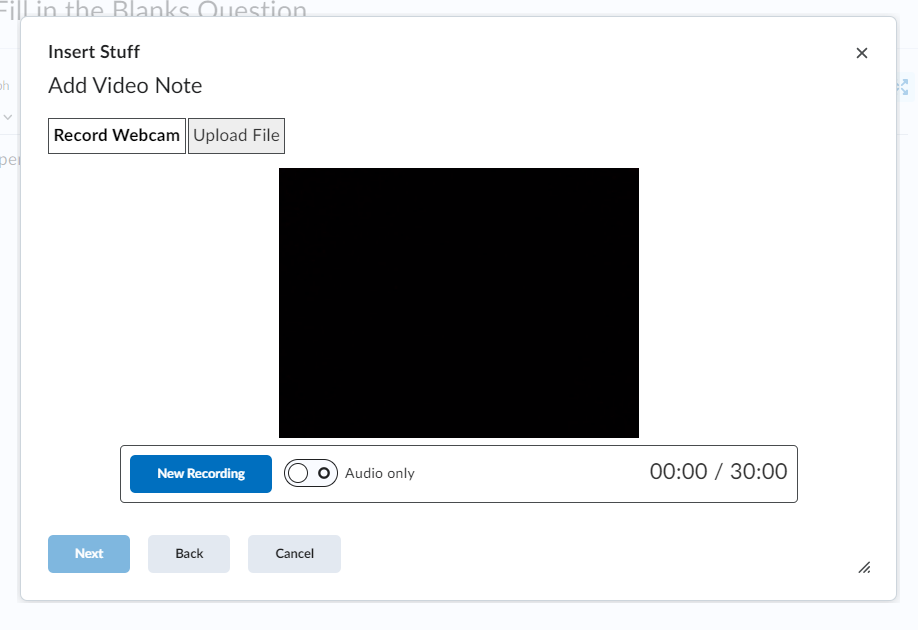
5. If you record a video, successfully record your session and then click the Next button
6. Fill in the video description; select the option to automatically generate captions from audio after having indicated a language
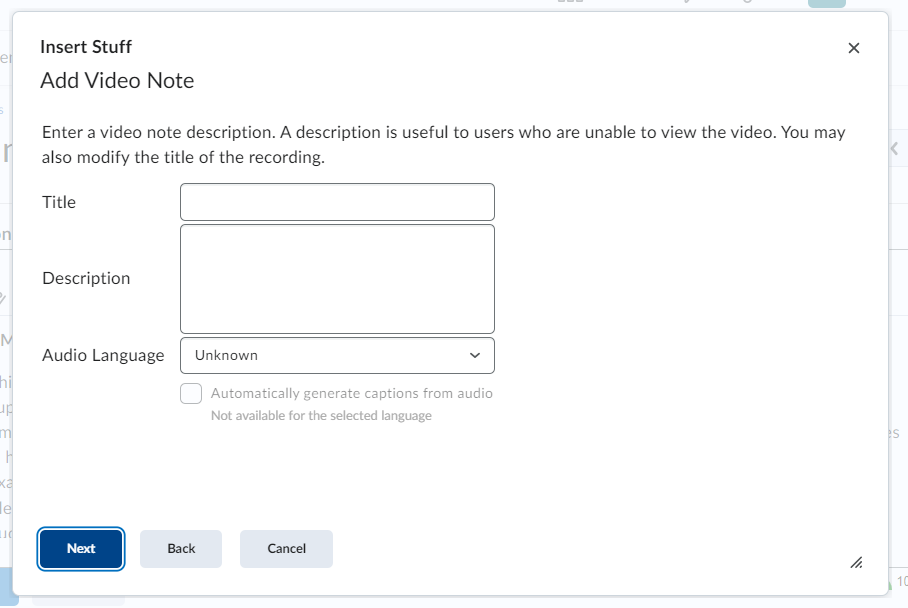
7. Click the Next button, the Insert Button, and the Save button
Quiz Submission Views
The “Submission Views” tab in a Quiz allows you to customize what students see after they submit a Quiz. By default, students cannot see any information other than their score after submitting a Quiz. To adjust the submission views, click on the “Evaluation & Feedback” tab in the appropriate Quiz and the “No questions” dropdown menu. From there, select the setting you wish to apply to the Quiz for the students enrolled in the course.

If you wish to set conditions for accessing a Quiz, you do that through the “Availability Dates & Conditions” tab and the “Release Conditions” link.

You will then select, in the first instance, “Create New.” Using that as your parameter, Talon provides a dropdown menu for “Condition Type” in association with each Content Item. In this case, select “Quizzes.”
Your conditions are applied in relationship to:
-
- Score on a quiz: selects the criteria (greater than or equal to, less than or equal to, etc.) and the percentage score associated with it
- Completed quiz attempt: sets the number of attempts for taking a Quiz
- Score on selected questions: only applies if Learning Objectives have been provided
- Score on associated rubric: allows for the selection of the quiz and the associated rubric the quiz is graded with
- Release final grade score: releases a final grade after a quiz is submitted or after certain criteria have been met (as with Score on a quiz)
Tips for Securing Quizzes
Despite our best efforts, some students will attempt to cheat! Here are some approaches to discouraging academic dishonesty that you can apply when building a Quiz.
Timing & Display Tab
-
- you can set a time limit for the Quiz – the default, if a limit is chosen, is 120 minutes. If a limit is applied, a Quiz will be automatically submitted when the time runs out
- “Paging” limits the number of questions that can appear on a page
- “Shuffle Quiz” will randomly select questions for each student
- “Display” gives you the option of disabling some elements that may help, or hinder, a student’s performance
Availability Dates & Conditions Tab
-
- you can restrict the time-frame that students can access the Quiz
Submission Views
-
- you can adjust the views a student receives upon completing a Quiz
Quiz Question Edits
-
- you can offer students short answers or essays in stead of multiple choice or true-false questions
- in order to reduce you can shuffle the administration of questions for students
- when working with multiple choice questions, the delivery order of possible responses can be randomized

Lockdown Browser for Quizzes
Respondus LockDown Browser® is a tool in Talon for auto-proctoring exams that locks a student’s testing environment. A tool working in conjunction with LockDown Browser® is the LockDown Monitor which records an identity verification and the student’s face during the entire assessment.
LockDown Browser® “locks” a browser on a computer or iPad, making it impossible for students to copy, print, access other applications, or visit other websites during an online assessment. It also blocks hundreds of common and advanced methods of digital cheating, such as the use of remote desktops, screen sharing, instant messaging, screen recording, keystroke combinations, launching applications with timers/alerts, browser cache exploits and much more.
How LockDown Browser Works
-
- assessments are displayed full-screen and cannot be minimized
- browser menu and toolbar options are removed, except for back, forward, refresh and stop
- access to other applications including messaging, screen-sharing, virtual machines, and remote desktops is prevented
- printing and screen capture functions are disabled
- copying and pasting anything to or from an assessment is prevented
- right-click menu options, function keys, keyboard shortcuts and task switching are disabled
- an assessment cannot be exited until the student submits it for grading
- assessments that are set up for use with LockDown Browser® cannot be accessed with other browsers
Watch this overview video to gain insight on how LockDown Browser® works from a student’s perspective.
What do Students Install?
-
- students need to download and install the LockDown Browser® application; they will need to have admin rights on their computer in order to install the software.
- the download link appears on a quiz’s start page whenever the exam requires the use of LockDown Browser.
- if students can use LockDown Browser® on an iPad (this is a permission an instructor must set), the application it can be downloaded from the Apple App Store (go here for more details)
System Requirements for Students
-
- LockDown Browser® is available for Windows, Mac, and iPad devices. For complete details, see the section System Requirements (Students)
- iPad Users: note that LockDown Browser® settings have an iPad option that must be enabled on a per exam basis; some instructors don’t permit iPad use unless it’s placed on a stand and used with an external keyboard (the video recording has too much motion otherwise); refer to this KB article for more details
- Chromebooks: Respondus LockDown Browser® allows Chromebooks by default
- Mobile Phones: LockDown Browser isn’t available for use on mobile phones
Enabling Lockdown Browser on a Talon Quiz
Visit Course Admin > Lockdown Browser. Select the Quiz you wish to apply the LockDown Browser® to and click the action arrow [V] associated with the Quiz and then click the “Settings” link. You can then choose to require LockDown Browser®.
If you “require” LockDown Browser® for the assessment, you are given additional conditions to set – if you wish. Choose what is appropriate and then click the Save + Close button.
Reviewing the Proctoring Results
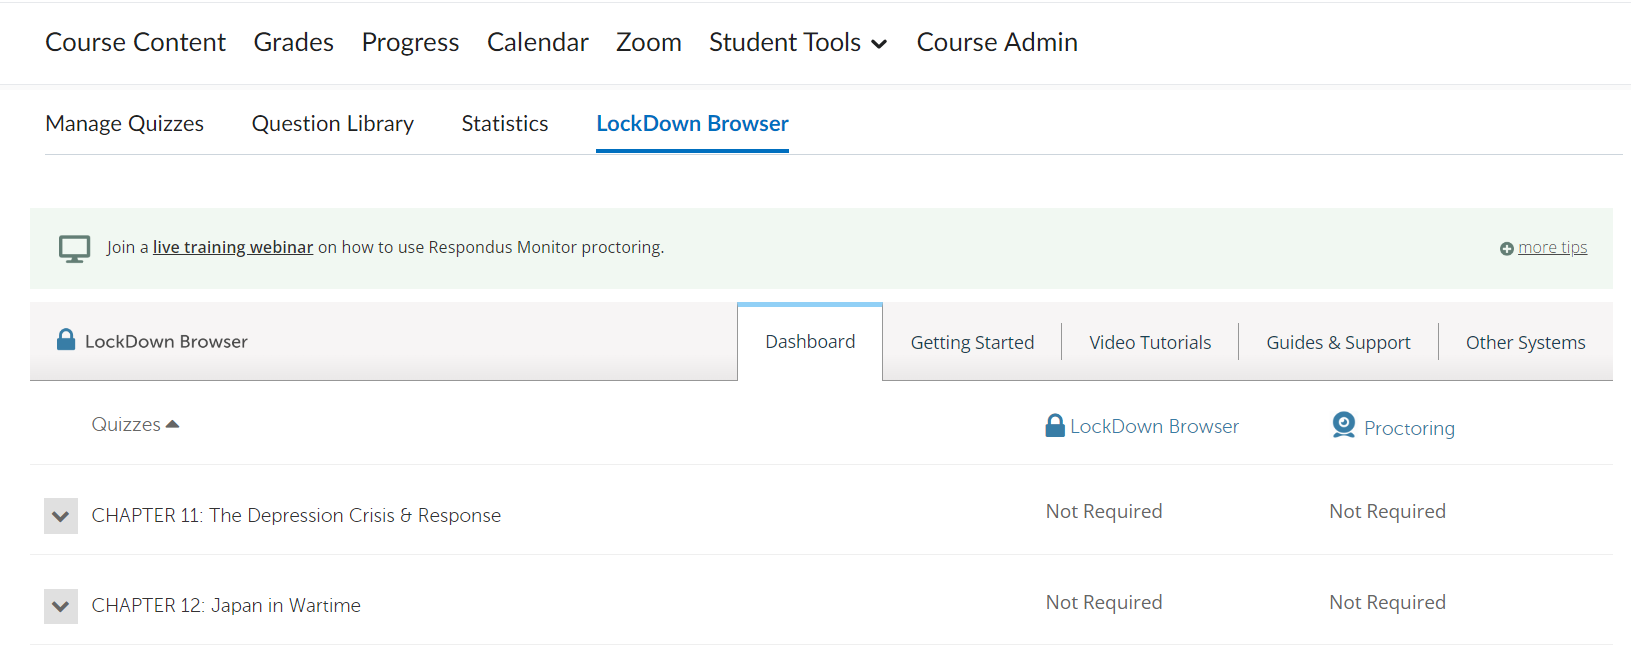
Everything an instructor does with LockDown Browser® and Monitor occurs from the LockDown Browser® Dashboard within Talon (Course Admin > Quizzes > Lockdown Browser).
Once students have completed an exam using Respondus Monitor, go to the LockDown Browser® Dashboard and select “Class Results” from the context menu to the left of the exam name. The class roster and proctoring results for the exam will appear. The flags (if any) will be shown on the timeline and you can review any part of the exam video.
Exempting a Student from Lockdown Browser Use
You can use the Talon settings to remove the Lockdown Browser requirement for a student.
-
- Go to Course Admin > Quizzes and click the quiz title to edit the quiz settings for that Quiz
- Click on the “Availability Dates & Conditions” tab
- Under “Special Access” click on “Manage Special Access”
- Click “Allow selected users special access to this quiz” and then click the Add Users to Special Access button
- Under Lockdown Browser, check “Not required to take this quiz” checkbox
- Under Users, place a checkmark next to each student who will not be required to use LockDown Browser®
- Click Add Special Access button at the bottom of the screen
- Save your changes and close the quiz
Understanding Proctoring Results
Here’s a great overview on Understanding Proctoring Results for Respondus Monitor. It explains how flagging works, facial detection, and other goodies.
Respondus Support: 24/7 Live Chat
Remember students can access built-in troubleshooting and live chat from within Respondus Monitor if they encounter a technical problem. You can find more resources for students, including how to access Live Chat.
For additional information, take advantage of an Instructor Quick Start Guide.
[VIDEO CONTENT FORTHCOMING]
Grading Quizzes
When you want to grade a quiz, you must first create a quiz Grade Item and adjust the quiz settings (please note all question types except for written response can be auto-graded).
Creating a Grade Item and Adjusting Grade Settings
Within your quiz, the Edit Quiz page (Course Admin > Assessments > Quizzes > arrow menu “Edit”). If a Grade Item has already been created in the Grade Book, select the item from the dropdown menu. If not, select the “Add to Grade Book” link.
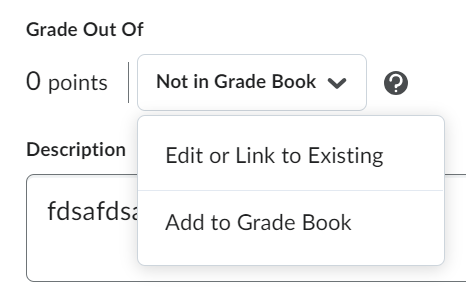
To add a Grade Item, enter a title and points possible. Save when done, and be sure the newly created grade item is now selected in the dropdown menu.
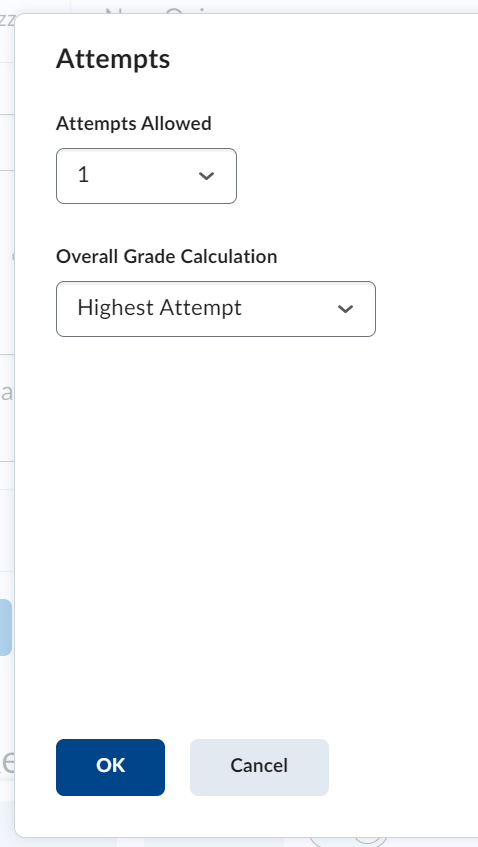
Scroll down to adjust the number of attempts allowed and the calculation type.
Under the “Attempts & Completion” tab, click the “Manage Attempts” link.
Manually Grading Quizzes
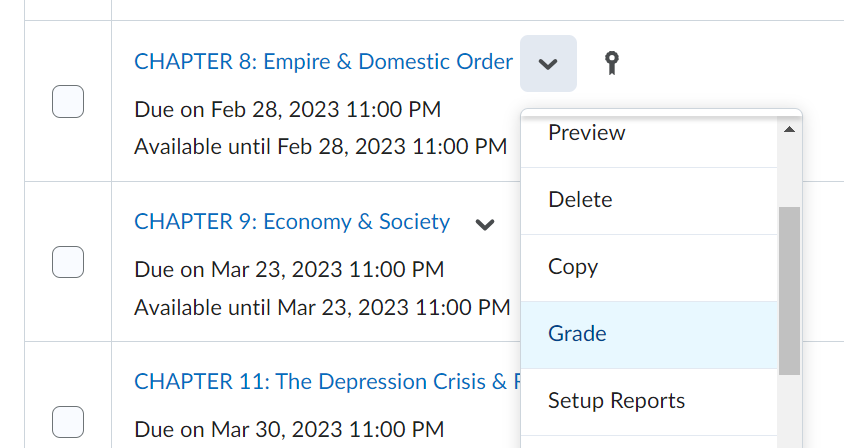
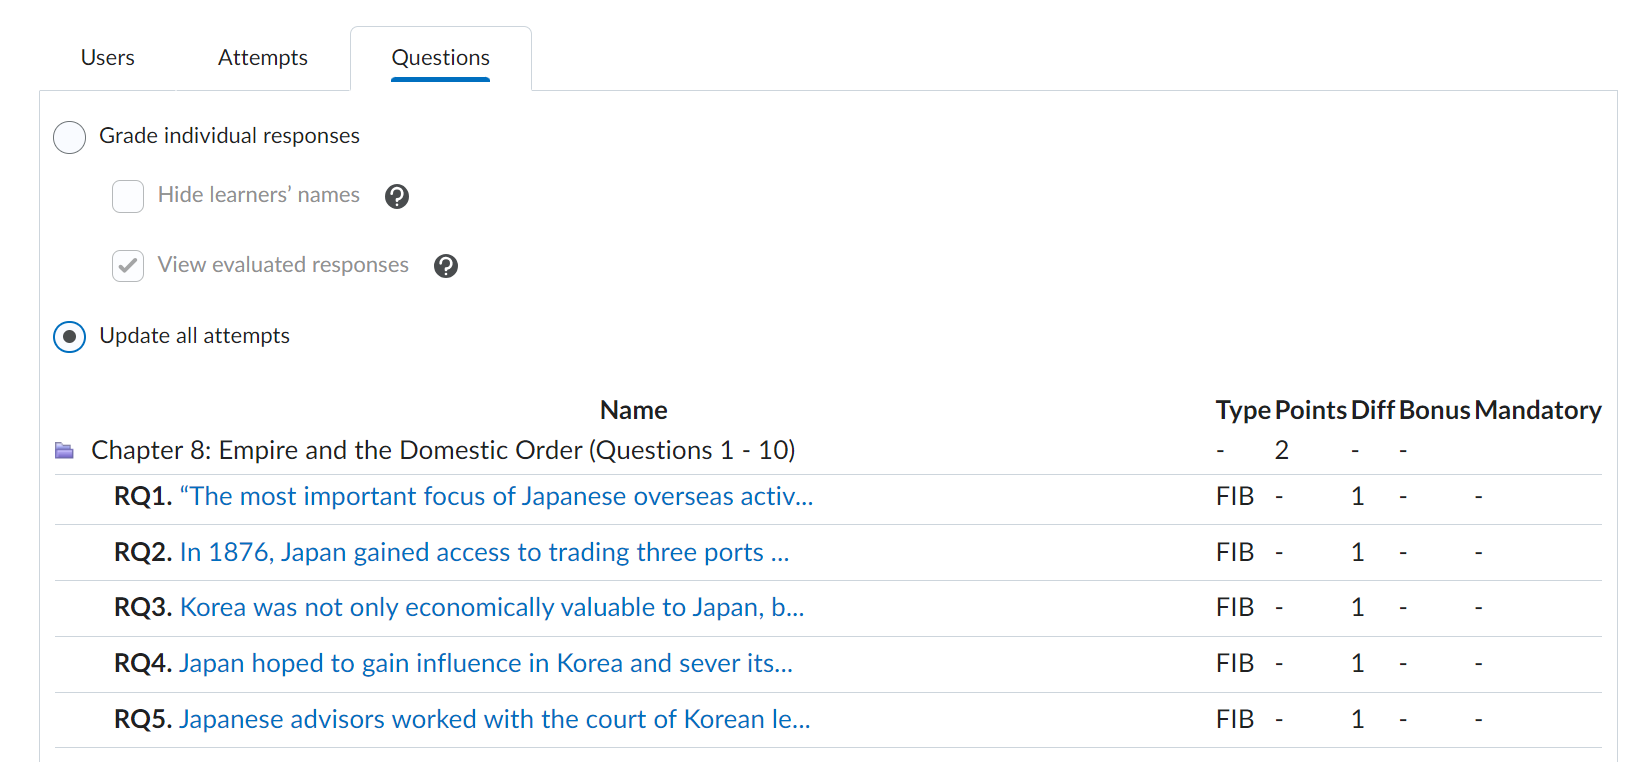
When you click on Course Admin > Assessment > Quizzes, you see a list of all of your created quizzes. Find the quiz you need to grade, click the action arrow [V] next to the name, and select “Grade” from the dropdown menu.
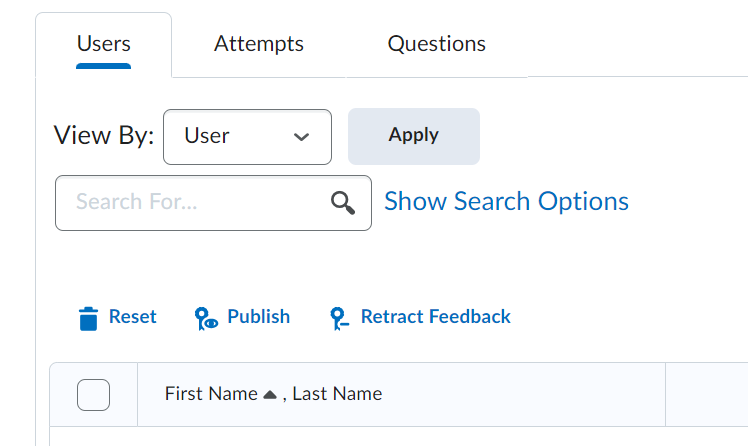
You can filter what to grade by Users, Attempts, or Questions. For this example, we will grade based upon the user – as you can see, the names of the students and each of their attempts appears.
To grade an attempt:
-
- click on the attempt # (you will see an Evaluation Summary of their attempt)
- if your questions include auto-grading questions, and you haven’t already set the quiz to auto-grade, click the Auto-Grade button
- if the “Graded” box is not checked, be sure to check that so a grade is published to the Grade Book
- if you wish, you can also add overall feedback
If you included manually-graded questions (such as short-answer or long-answer), scroll down the page to access those. Any scores that are entered in association with those questions will automatically be added to the final score. Be sure to save your changes by clicking the Save and Close button.
Resetting a Quiz Attempt
Visit Course Admin > Assessment > Quizzes to view the list of your created Quizzes.
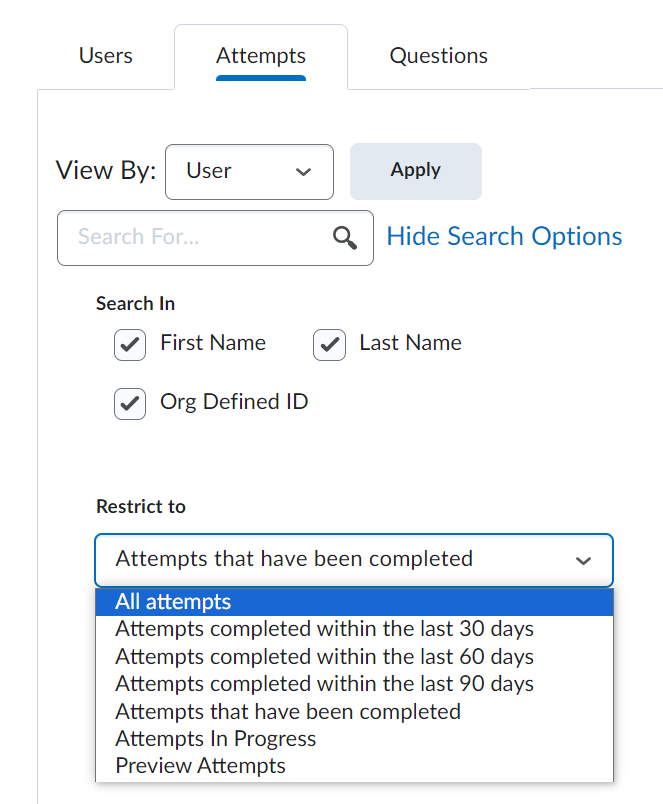
Click “Grade” from the dropdown menu associated with the Quiz and go to the “Attempts” tab. Click “Show Search Options” and then choose “All attempts”; then click the magnifying glass icon to conduct the search.
Click the “Reset” trashcan icon and click “Yes” when the confirmation pop-up appears.

[VIDEO CONTENT FORTHCOMING]
Updating a Question in a Graded Quiz
Updating a Graded Quiz Question
There may be times when you need to update a self-grading answer on a Quiz. First, go to the Course Admin > Assessment > Quizzes.
Select the Quiz you want to edit; chose the user submission you wish to update. Click into the correct submission attempt, make your changes, and then click the Update button.
Awarding Points for Wrongly Keyed Quiz Questions
Resetting a Quiz Attempt
There are many cases in which students do not complete a Quiz attempt. Luckily, instructors have options to address this by either allowing another attempt (by providing special access to the Quiz) or by resetting the Quiz attempt.
Steps to Resetting a Quiz Attempt
-
- In your course, click Course Admin > Assessment >Quizzes
- On the “Manage Quizzes” page select “Grade” from the dropdown menu associated with the chosen Quiz
- By default the “Grade Quiz” page only displays completed attempts. To view attempts in progress, click on the “Users” tab and select “Users with attempts in progress” in the “Restrict to” filter; you can also click on the “Attempts tab” and select “All attempts” in the “Restrict to” filter
- Select the check box for the student attempt you want to reset; click the “Reset” icon at the top of the list of Quiz attempts
