
10 Communication

Communication is Key!
Attendance in Talon
Many instructors use Talon to record student attendance. The Attendance tool (Course Admin > Learner Management > Attendance) has a few limitations:
-
- attendance CANNOT be tied to the Grade Book
- attendance registers must be created manually, meaning instructors need to individually enter the days and times for each class meeting – which can be tedious
[VIDEO CONTENT FORTHCOMING]
Email in Talon
Talon has an tool allowing instructors to send Email to individuals enrolled in a course. This is not an internal messaging system since replies are sent to official Kirkwood Email accounts.
The Email tool can be accessed from the Mini Navbar by clicking the envelope icon. From here, you can send individual or class Emails. Addresses can be found using the address book; however, the easiest way to send Emails is using the Classlist.
Emailing students using the Classlist:
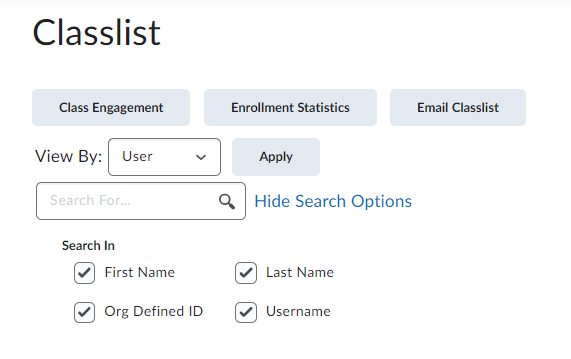
1. Visit Course Admin > Learner Management > Classlist
2. Click the Email Classlist button; please note this includes all students on your classlist – if you need to exclude any students or send to a message to just one individual, you can do so by using the “Show Search Options” function or by removing recipients in Step 4
3. Click the Send Email button
4. All students will appear in blind carbon copy and you can remove students by clicking on the x next to their name
5. Type your message and click the Send button
6. When a message is sent from Talon, the subject line will automatically populate with Talon – Course Name.
7. All Talon messages are sent to official Kirkwood Email accounts and any responses are sent to an instructor’s official Kirkwood Email account as well
[VIDEO CONTENT FORTHCOMING]
Instant Messaging
The Instant Message tool is Talon’s internal messaging system; students can send instructors or other students instant messages. Instant Messages live inside Talon and are not forwarded outside of Talon.
The Instant Message tool is access through the envelop icon in the Mini Navbar.
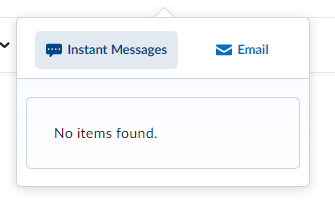
A new Instant Message will be indicated by a orange dot on the envelop icon.
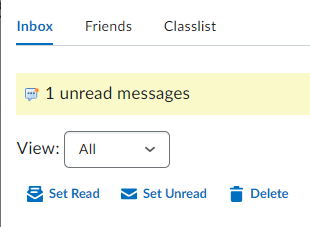
Clicking on the Instant Message tool opens a pop-up box sharing either a Inbox, Friends, or Classlist tab. “Friends” are individuals you Instant Message frequently; anyone can be added to a “Friends” account. The “Classlist” shows members of the class you are currently in, and instructors can send individual messages to students or other faculty enrolled in the section.
The green identifiers next to individual names shares when someone is currently online; an “online status” does not mean they are available to chat via Instant Message – it just means they are currently logged in to the system.

To send an Instant Message, go to the Classlist tab and select individual or multiple students, then click “Message.” Type the message and then click the Send button.
To reply to messages, go to the Inbox, click on a message, type a reply, and then click on the Send button.
Announcements
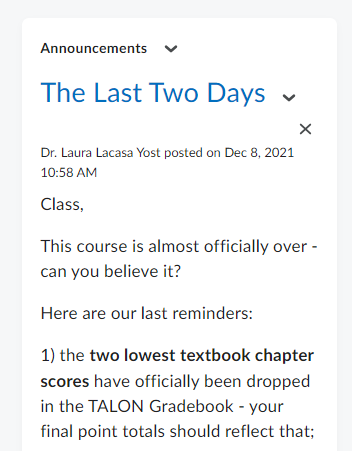
Announcements communicate changes or updates in a course, provide weekly wrap-ups, share due date reminders, or relay any other information an instructor thinks is important enough for everyone to know right away and all at once.
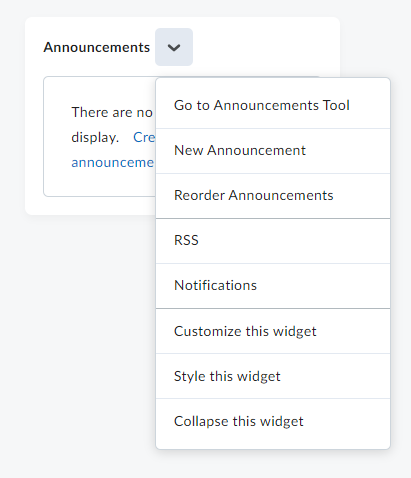
To create a new Announcement, click on the action arrow [V] in the Announcement widget and select “New Announcement.” If you do not have an Announcement widget on the Talon Homepage, then access creation functions via Course Admin > Communication > Announcements.
Enter a Headline and the Announcement’s content; a full HTML editor is available within this tool.
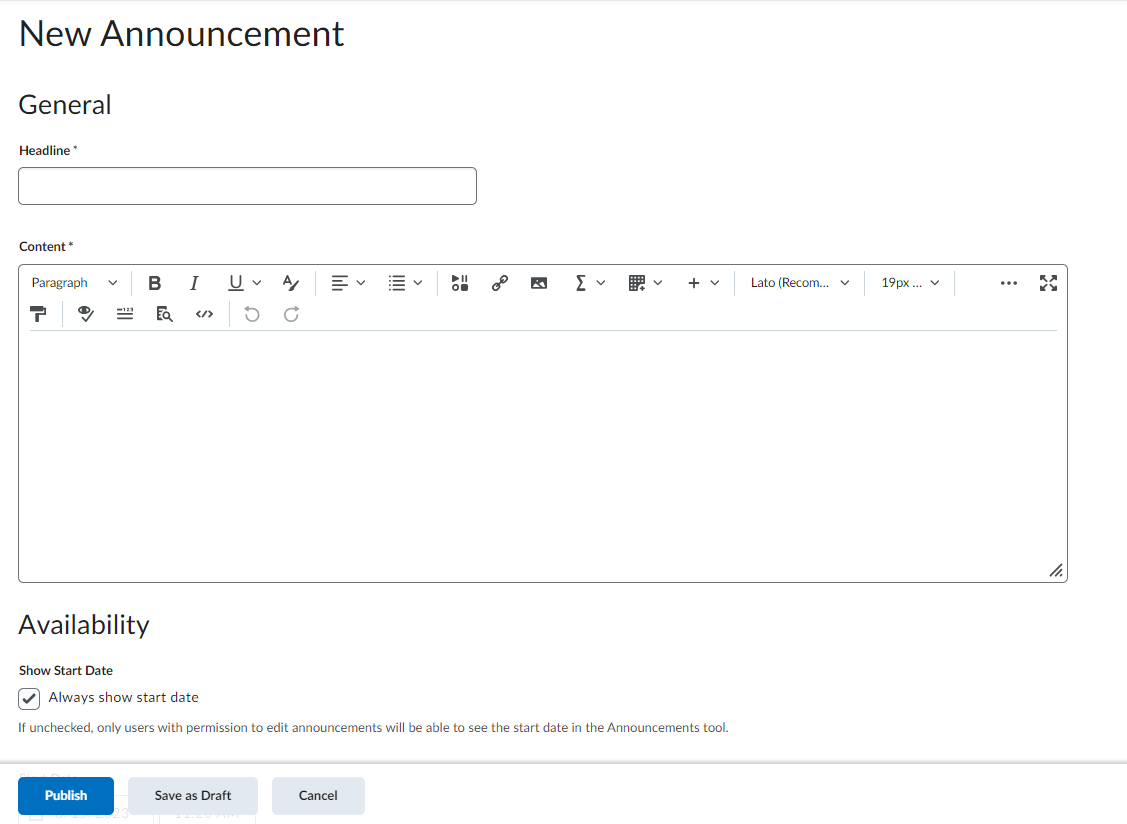
Adjust the Start and End Dates. By default, the Start Date is set to the date and time you publish the Announcement. Instructors must choose an End Date – which is highly recommended so an Announcement does not display all-semester long or appear later in a copied Talon course shell.
[VIDEO CONTENT FORTHCOMING]
Activity Feed Widget
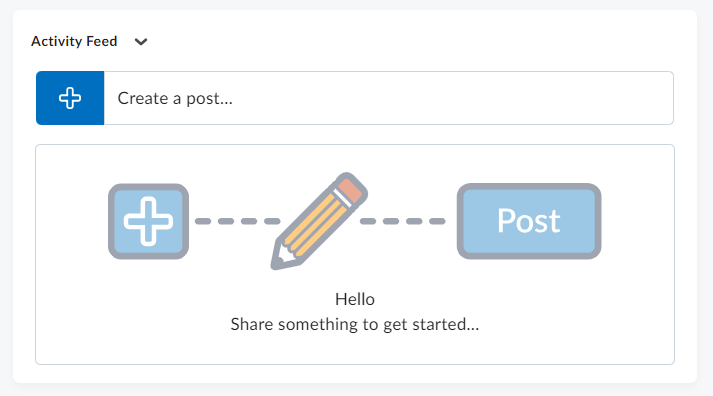
The Activity Feed Widget is a communication alternative to an Announcement. With this social-media-like tool, you can create “posts” to share with students, and students can comment back, creating interaction amongst students and with the instructor.
Adding the Activity Feed Widget
To add the Widget, visit Course Admin > Site Setup > Homepages. Click on your active homepage to edit it, and then click the Add Widgets button and locate the Activity Feed Widget.
Creating posts in the Activity Feed Widget is as easy as clicking the “Plus” icon or clicking in the “Create a post . . .” box and typing!
You’ll have the option of creating either a Message or Assignment. In general, a Message is like an Announcement and an Assignment is like an Assignment with a submission folder. Best practices favor placing Assignments in the Course Content section of Talon.
You can allow or turn off commenting to your posts, as well as attach several file types if you wish to share those with students.
Video Note
In some tools such as Email, Intelligent Agents, Feedback, etc. you can attach new or existing Video Notes; these are embedded in an HTML file and require the user to be logged into Talon for viewing.
Instructors can use Video Note to do the following:
-
- creating a new topic in a Content area
- adding descriptions to a Module or a topic in the Content area
- creating Announcements on the course Homepage
- providing instructions in conjunction with a submission folder for an Assignment
- sharing feedback on students’ Assignments
- describing a new topic in Discussions or making a post on a Discussion topic
- giving feedback in the Grade Book
- composing an Email
Video Note is also available for students if they wish to:
-
- add comments to uploaded Assignment
- posting a new thread or replying on someone’s thread in Discussion topic
- composing a Talon Email
Some limitations do exist with Video Note:
-
- recordings with Video Note are limited to 30 minutes
- recordings posted in Content, Assignments, and Discussion topic details can be copied from course to course
- recordings can’t be captioned
Creating a Video Note
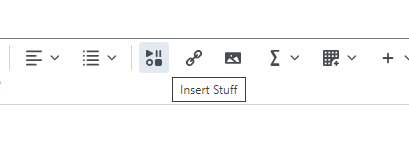
When in an HTML editor, select the Insert Stuff button.
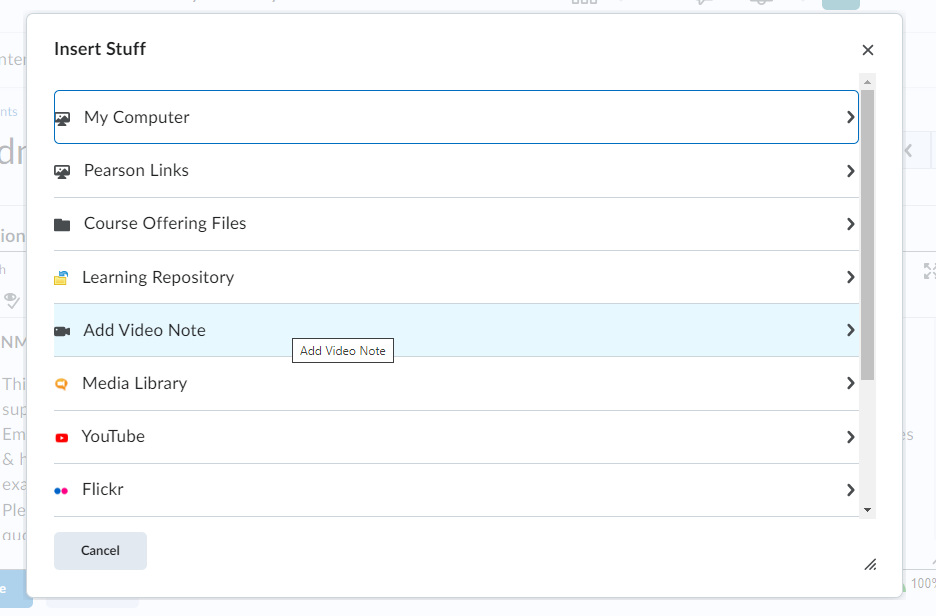
Select “Add Video Note” from the pop-up dialogue box.
Video Note connects to cameras via a browser; if no camera is detected, users may see a warning. Dependent upon browser and operating system, the system may ask the user about browser media settings. Users should s “Allow” to make the connection; this decision can be remembered by selecting the “Remember this decision” checkbox.
After the webcam image appears, select the New Recording button and recording of the video will commence.

To stop the recording select the Stop Recording button.
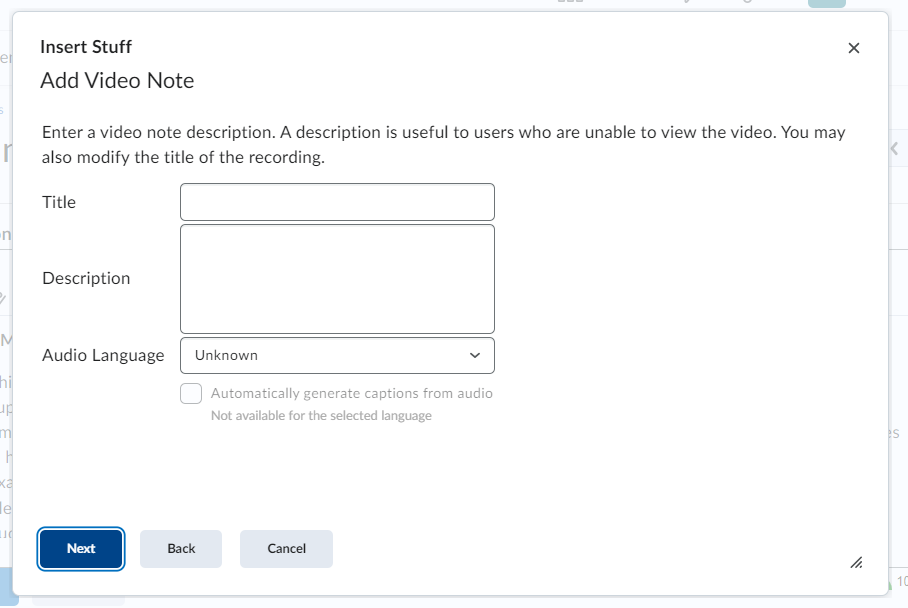
After a recording is stopped, select the Next button and a processing message will appear, followed by a description page. Give the video a description and, if necessary, a title and then click the Next button to move ahead in the process.
Select the Refresh Preview button to preview the video. It is also possible at this step to go back and repeat the process by clicking the Back button. Select the Insert button to insert the video into the HTML file where the cursor is located.
Intelligence Agents
An Intelligent Agent monitors student activity within a course to see if it meets particular criteria: log-in activity, course activity, and release conditions. When criteria are met, faculty can employ automated communication with tailored messages appropriate to the context.
Intelligent Agent User Page
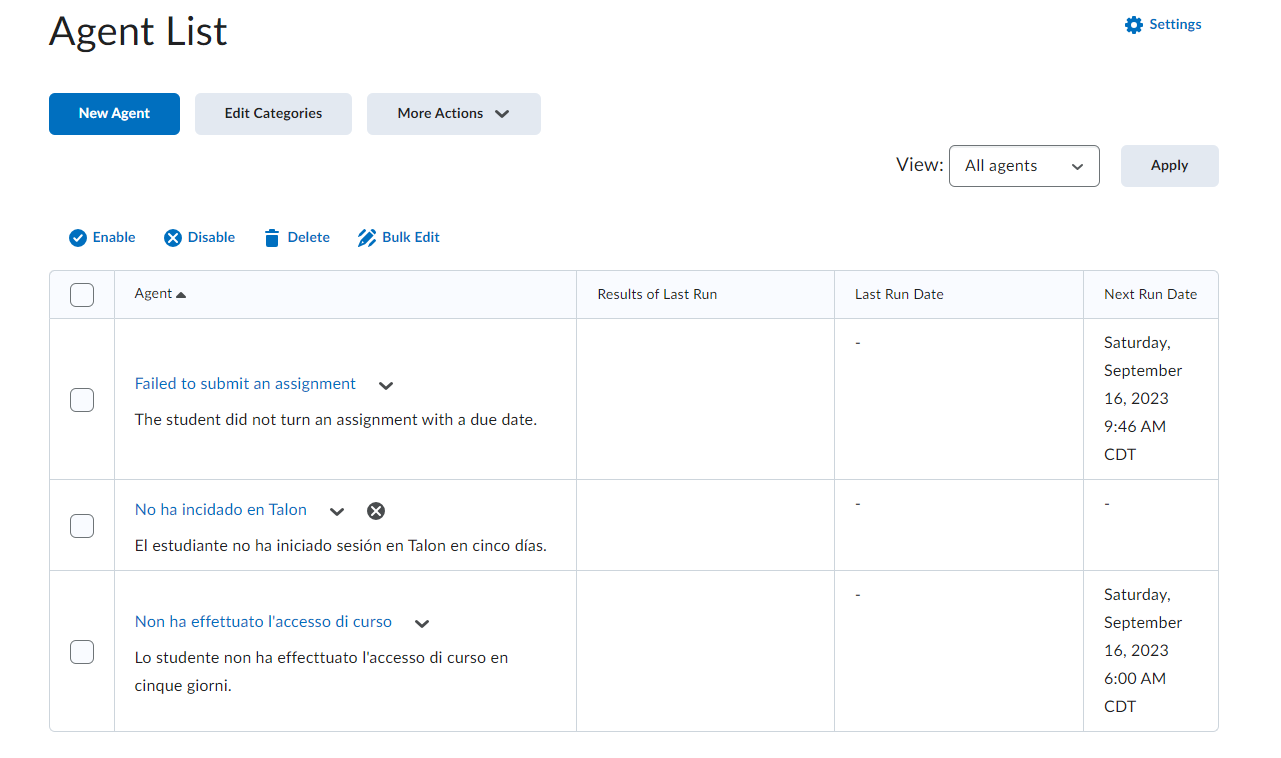
- More Actions: restore or export Agent History
- Agent [V]: Edit, Copy, View History, Export History, Practice Run, Run Now, Delete
- Results of Last Run: identifies how many students met established criteria
- Last run date: when the last criteria check was initiated
- Next Run Date: when the next criteria check will take place
- Settings: customizes email communication (Name and Reply-To address)
Creating a New Agent
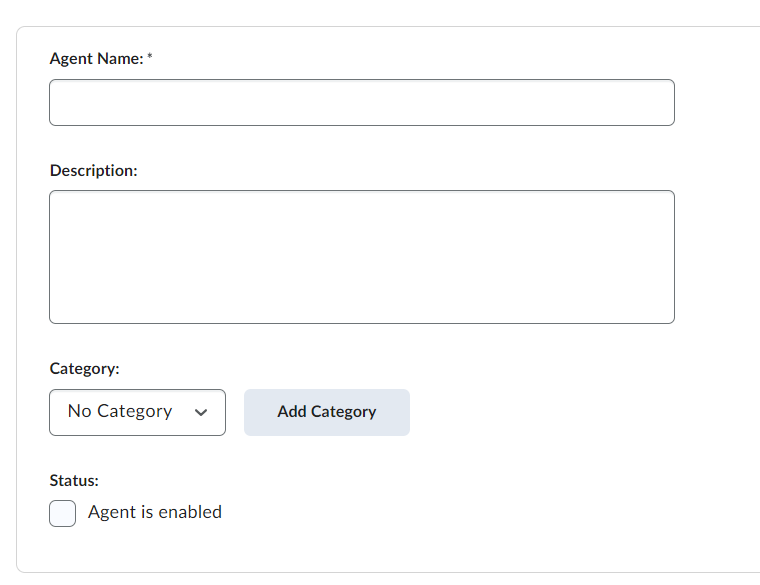
- Agent Name: an Agent’s title
- Description: what purpose does this Agent serve?
- Category: defines how you want to organize your Agents (quizzes, assignments, discussion board, exams, support message, etc.)
- Status: shares whether or not the Agent is enabled; this can be changed at any time – even from the User Page
Scheduling
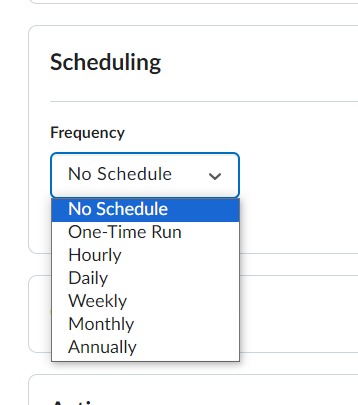
- Frequency: how often do you want Talon to run the Agent?
Criteria
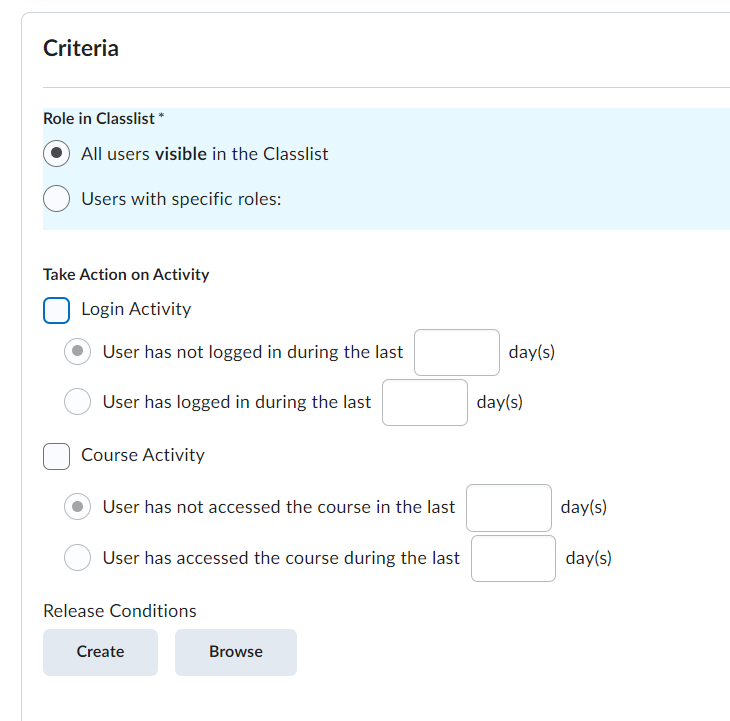
- Role in Classlist: select all users to capture the student roster; Users with specific roles include instructor, instructor test student, tutor, and more
- Take Action on Activity:
- Login Activity: to address student activity in Talon
- Course Activity: to address student activity in the course
Release Conditions:
-
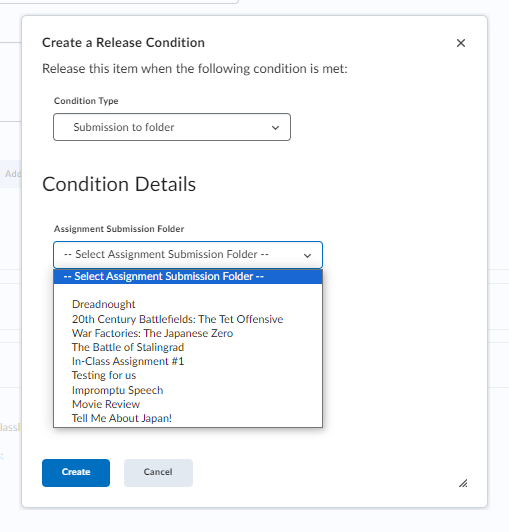
- Create:
- Condition Type: select a) what element in the course you want to follow-up on with students (assignments, checklists, competencies, content, discussions, grades, quizzes, etc.) and b) what performance condition needs to be met
- Create:
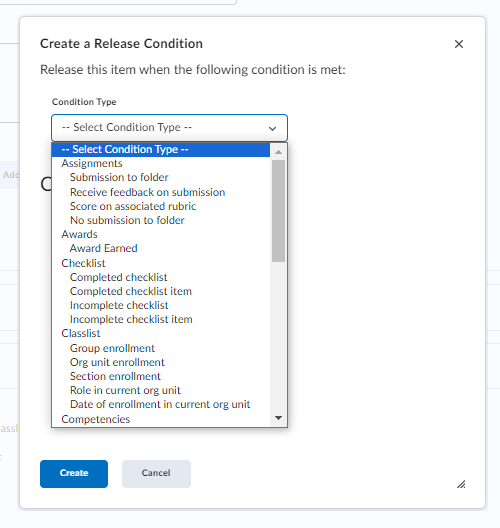
- Condition Details: once the element has been chosen (in this case, we are working with a submission folder), select what particular item it applies to. A list of written assignment drop boxes appears in this example.
Example: Release Conditions Related to Scores
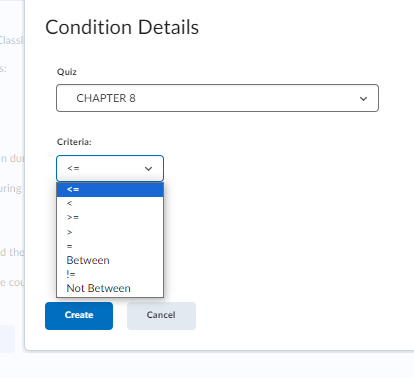
- Criteria:
- < = less than or equal to
- < less than
- > = more than or equal to
- > more than
- = equal to
- Between between two percentages
- != not equal to
- Not Between not between
- Grade: what is the percentage associated with the Criteria (appears once Criteria is established)
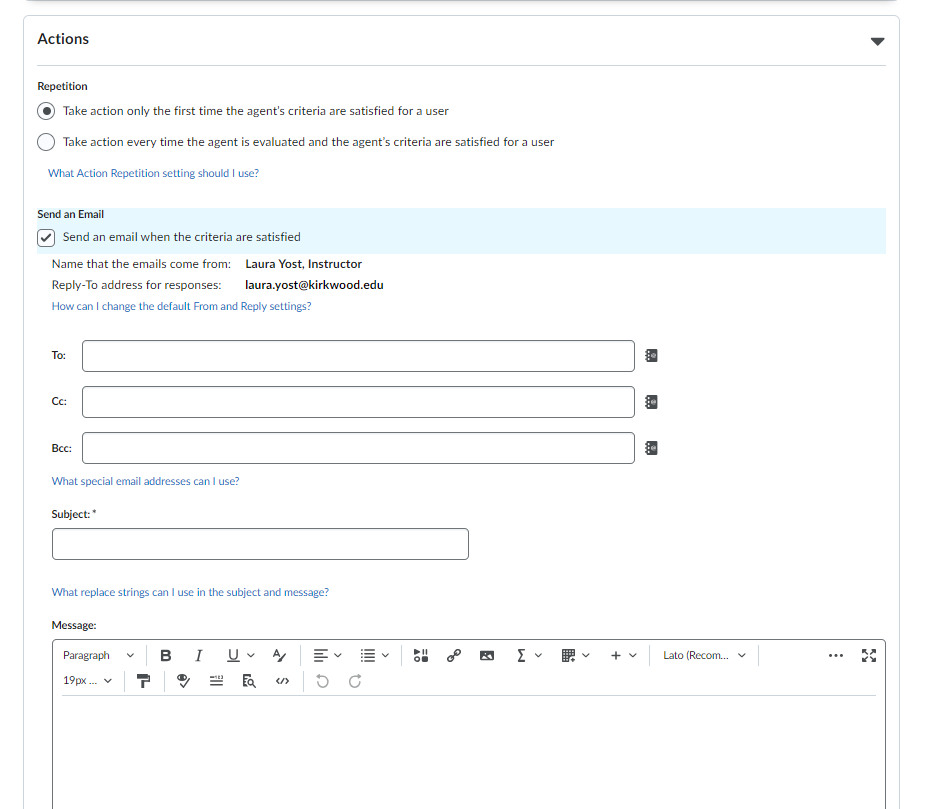
Actions
- Repetition: when do you want your action to take place – the first time or every time an Agent runs?
- Send an Email: contact students via email when criteria are met
- o What special email address can I use: refer to Settings
- o What replacement strings can I use: refer to Replacement Strings
- Attachments: attachments can be included in an email
- Email Format: HTML or text formats are available
Replacement Strings
These generate personalized elements when placed in a subject line or message:
Email address field:
- {InitiatingUser} – User who performs the action that meets the agent’s criteria.
- {InitiatingUserAuditors} – The auditors for the user who performs the action that meets the agent’s criteria.
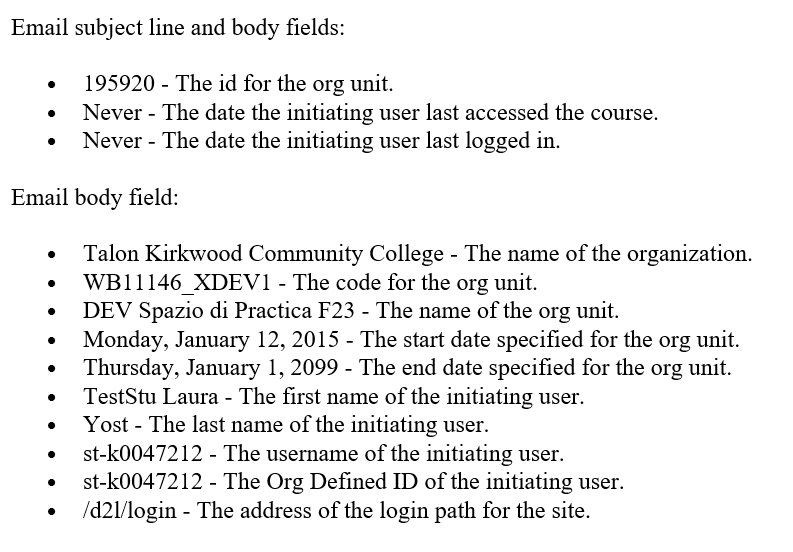
Email subject line and body fields:
- {OrgUnitId} – The id for the org unit.
- {LastCourseAccessDate} – The date the initiating user last accessed the course.
- {LastLoginDate} – The date the initiating user last logged in.
Email body field:
- {OrgName} – The name of the organization.
- {OrgUnitCode} – The code for the org unit.
- {OrgUnitName} – The name of the org unit.
- {OrgUnitStartDate} – The start date specified for the org unit.
- {OrgUnitEndDate} – The end date specified for the org unit.
- {InitiatingUserFirstName} – The first name of the initiating user.
- {InitiatingUserLastName} – The last name of the initiating user.
- {InitiatingUserUserName} – The username of the initiating user.
- {InitiatingUserOrgDefinedId} – The Org Defined ID of the initiating user.
- {LoginPath} – The address of the login path for the site.
These are the replacement strings in action:
[VIDEO CONTENT FORTHCOMING]
Replacement Strings
Replacement Strings can personalize messages! For example, when sending an Email to a group of students, you could use a replacement string to individualize the message each student receives by using their first name.
To insert a replacement string into a message, simply type in the replacement string where you would normally place the name or other text type as given.
A list of replacement string options appears below:
-
- {OrgUnitName} : displays the name of the course
- {FirstName} : displays first name of the user
- {LastName} : displays last name of user
- {Email} : displays Email of user
- {OrgUnitStartDate} : displays Course start date
- {OrgUnitEndDate} : displays Course end date
- {LoginPath} : displays URL for Talon (http://talon.kirkwood.edu)
- {UserID} : displays a User’s k#
- {InitiatingUserFirstName} : displays the first name of the initiating user
- {InitiatingUserLastName} : displays the last name of the initiating user
- {InitiatingUserUserName} : displays the last name of the initiating user
- {InitiatingUserOrgDefinedId} : displays the last name of the initiating user
- {InitiatingUser} : displays the user whose behavior meets the agent’s criteria (for example, a student who has not logged in for 5 days)
- {InitiatingUserAuditors} : displays the auditors for the user whose behavior meets the agent’s criteria
- Talon Kirkwood Community College : displays the name of the organization
Groups
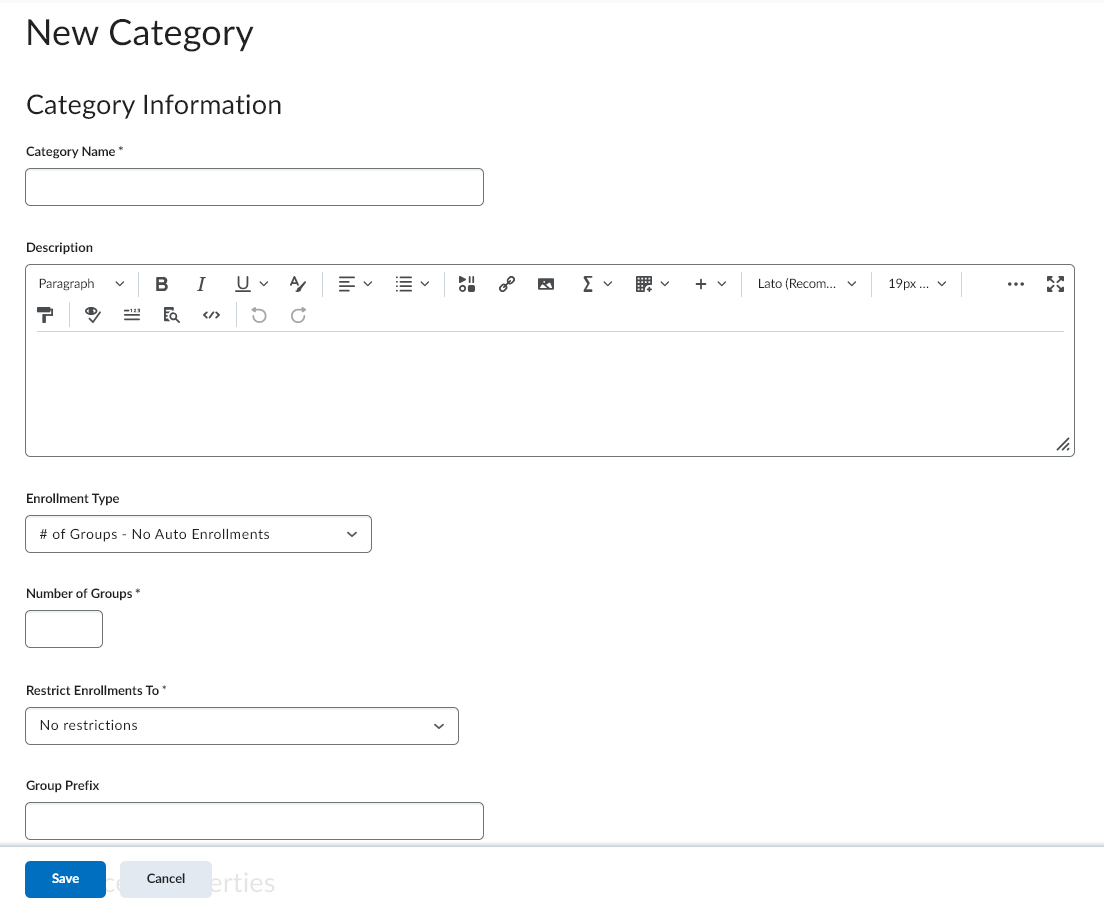
Groups Tool: Create a New Category

Category Information
- Enrollment Type: dropdown menu provides grouping options (refer to Enrollment Type section)
- Number of Groups: the number of groups chosen
- Restrict Enrollments To: have no restrictions, select the course section, or choose from established Groups
- Group Prefix: optional ability to provide groups with a title
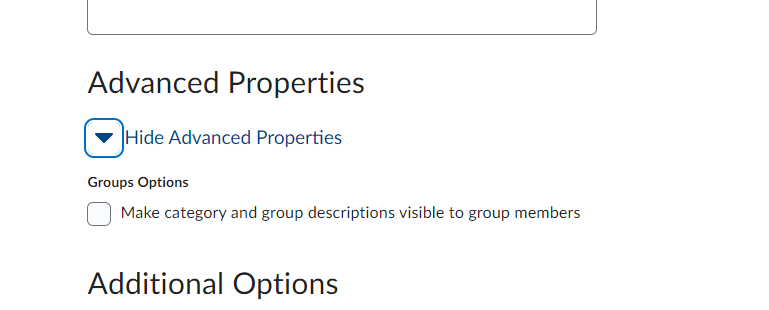
Advanced Properties
- Group Options: auto-enroll new users, randomize how users are placed in groups, category and group descriptions can be made visible to group members
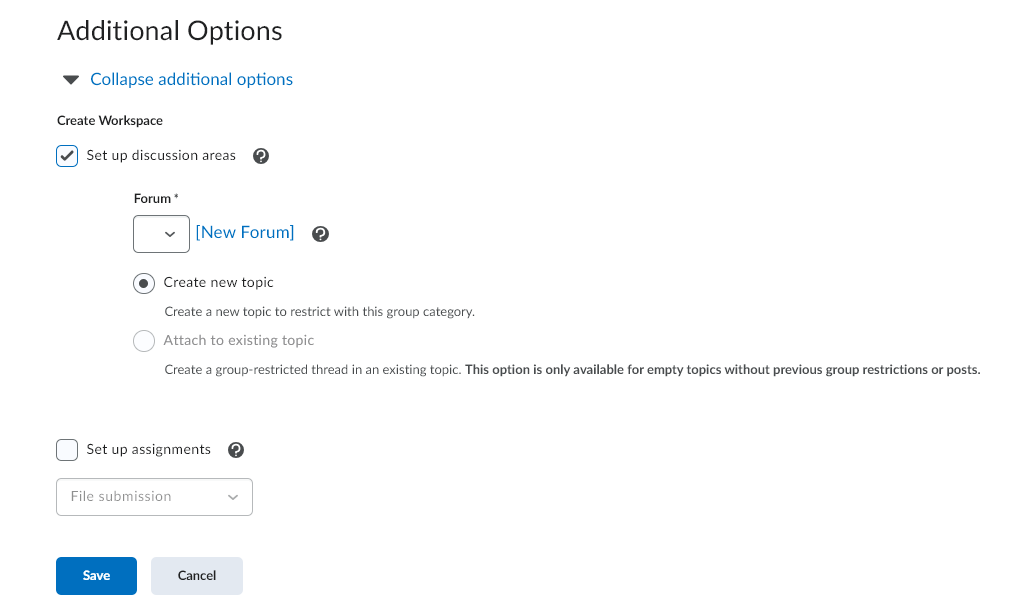
Additional Properties
- Create Workspace: group works areas can be created in association with discussions or assignments
Enrollment Type
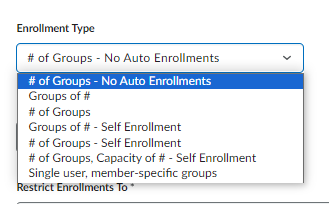
- # of Groups – No Auto Enrollment: create a specific number of groups into which you can add learners. USE: when you know how many groups you want to create and which users you want in each group.
- Groups of #: create the minimum number of groups needed to place learners in groups of a specified maximum size. USE: when you know how many users you want in each group.
- o If learners are enrolled in the course before groups are established, Can be auto enrolled into groups is enabled; one student is added at a time into each group.
- o If Auto-enroll new users is enabled, and all groups reach their maximum capacity, a new group is created to accommodate new students.
- o If Can be auto enrolled into groups is disabled, the minimum number of groups needed to create groups of a specified size are created; no users are enrolled in them. Students can enroll using the Groups page.
- # of Groups: create a specified number of groups. USE: when you know how many groups you want to create, but want the system to place users in the groups for you. USE: when you want group rosters created at random, or you are limited in the number of groups you can create.
- o If Can be auto enrolled into groups is enabled, one student is added at a time into each group.
- o If Can be auto enrolled into groups is not enabled, the specified number of groups is created and no users are enrolled in them. Students can enroll using the Groups page.
- Groups of # – Self Enrollment: create the minimum number of groups needed to accommodate users in a group of a specific size. Learners choose which group they want to belong to using the Groups page. USE: when you know how many users you want in each group, but you want to users to choose their own groups.
- # of Groups – Self Enrollment: create a specified number of groups into which students can enroll themselves. Learners choose which group to enroll in from the Groups page. USE: when you want to make a specific number of groups for users to join.
- # of Groups, Capacity of #: create a specific number of groups with a specific number of enrollees/group. Learners choose which group to enroll in from the Groups page. USE: when you know how many users you want in each group, you want to allow users to choose their own groups, and you want each group to have a maximum number of users.
- Single-user, member-specific groups: create a group with a single user where the first name and the last name of the user is the name of the group. When a new learner enrolls in the course, a group is created for them. USE: when you want to create a journal-type project (group) with a single member.
If you are enrolling users yourself, this is accomplished on the Manage Groups page once a Group is created.
- Click on the Group name (under the Groups column)
- Choose the Enroll Users to choose which students form that particular Group
- Choose the View Enrollment to see the student list within that Group
Creating Group Discussions
When creating Groups, it’s possible to create discussions for them (Additional Options > Create Workspace > “Set up discussion areas”
- Select “Set up discussion areas”

- Choose to create a “New Forum” (then click on [New Forum]) or attach to an existing Forum
- Choose to “create new Topic” (available only to the Group members) or “Attach to existing Topic” (with a Group-only accessible Discussion Thread)
- For “create a New Topic”:
- “Create one topic per group” > Create and Next > Done (click the Add Another to create multiple Topics within the same Forum > Done)
- “Create one topic with threads separated by group” > Create and Next > Done
- For “Attach to existing Topic” > “Attach to Topic” > Save
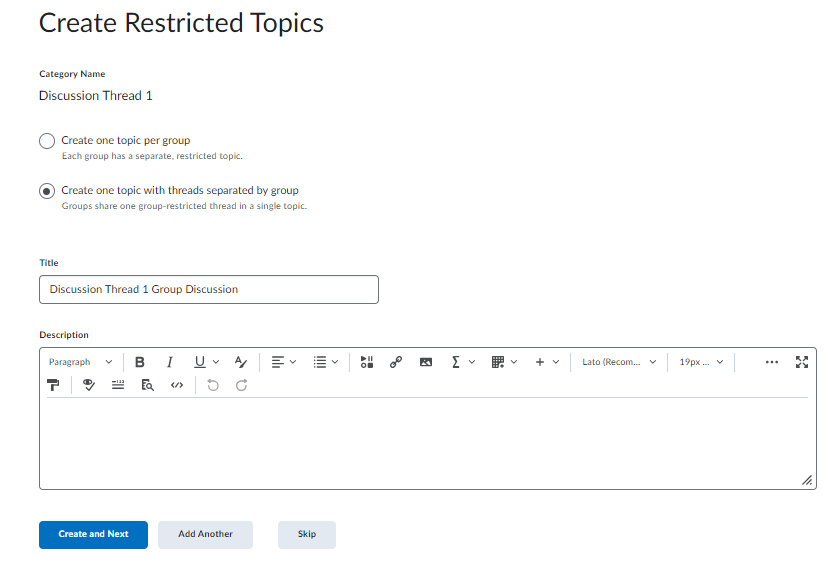
NOTE: 4a. allows you to see each group contribution independently of one another, making grading a little more complicated in that only one topic is tied to a grade item; 4b. is easier to grade, but a little more difficult to follow since Discussion Threads are all associated with one topic.
- Click the Save button
Creating Group Assignments
When creating Groups, it’s possible to create Assignments for them (Additional Options > Create Workspace > “Set up discussion areas”
- Select “Set up assignments”
- Select the type of submission via the drop down menu: file, text, paper, or “Observed in person”
- Click the Save button
On the Create Assignments page, you will provide a name, instructions, and determine the type of submission a student can share.
- Submission, Completion, and Categorization: Assignment Type, Submission type, Files Allowed Per Submission, Submissions, Notification Email, Category
- Evaluation and Feedback: Score Out Of, Grade Item, Student View Preview, Rubrics, Default Scoring Rubric, ePortfolio Artifacts, Anonymous Marking, Annotation Tools
- Clicking the Save button saves all your options OR
- Clicking the Add Another button lets you create another Assignment OR
- Clicking the Skip button creates the Group without any of the Assignment parameters in place
Incorporating Group Work into Your Course
Once you have created Group discussions and/or assignments, they must be placed within your course for students to access.
- Go to the Module in which you want to place your assignments
- Click Existing Activities > Discussions to add the group discussion forum
- NOTE: if you choose to create a new Forum or Discussion Topic at this time, neither will be in Group form
- Click Existing Activities > Assignments to add the group assignment
- NOTEL if you choose to create a new Assignment at this time, it will not be in Group form
- The Group Assignment is automatically hidden, so be sure to toggle it “Visible”
Remind Texting App
Remind is a web and phone application used for sending messages to entire classes or to individual students. Both students and faculty can receive these messages through Email, the Remind mobile app or through the texting application on their phone. It’s up to the user to decide how they would like to receive messages.
At Kirkwood, we “roster” all courses in Remind, which means courses are auto-created and students are loaded automatically. Users are currently added with their official Kirkwood email address as contact information. Rostering happens 14 days prior to the open date set on the course in Talon.
[VIDEO CONTENT FORTHCOMING]
Here are some quick answers to typical questions associated with Remind:
Q: Why have I received an invitation to Remind and what do I do with it?
A: We created all courses in Remind and invited instructors. If you want to use Remind with your class, claim your courses. If you don’t want to use Remind, you can delete the email or you can archive your courses in Remind.
Q: I can’t find the Remind notification/invitation in my email
A: If teachers can’t find the Remind email in their inbox, have them go to this link and type in the email address that was used to create their account. We use your firstname.lastname[at]kirkwood.edu version of your email address to create your account.
Q: I seem to have more than one account on Remind, how can I fix that?
A: Fill out the form linked to the Merge Duplicate Remind Accounts article and Remind can merge your accounts. Students will occasionally have duplicate accounts created in your class too. Share this same link with them so that they can report the issue to Remind.
Q: What can I do with Remind?
A: You can invite students to sign up for your class using their phone (we only add them with their email address). Share this video process with them to get them signed up with the phone. Your students will need to know your class code which you can find in Remind. Then you can send messages to students and they will be much more likely to see your communication. And even if they don’t sign up with their phone, they can still receive the message via email.
Q: How do I find my class code?
A: Click on your class in the Classes Owned list. At the top of the main window, just below the class title, find the @ symbol followed by letters and numbers. This is your class code.
Q: Can I change my class code?
A: Yes. You can customize your class code, but it does need to be unique to the institution, so you might be forced to pick a more unique title if it’s already been taken. To change your code, click on the class title in the Classes Owned list. Click on Settings in the main window.
Q: Do students know my phone number if I enter it in Remind?
A: No. That’s the great thing about Remind. You don’t know their phone numbers and they don’t know yours.
Q: Can students message each other?
A: By default, no. You do have the option to turn this feature on if needed in your class.
Q: Where can I learn more about how to use Remind?
A: You can look to the Remind help center for quick tutorials.
Q: How can I add Remind to Talon?
A: There is a Remind compose message widget you can add to your course. It will allow you to compose a Remind message rather than using your phone. There are also options to create a custom widget that displays your class thread in Remind.
Q: Where can I get help with Remind from someone at Kirkwood?
A: Send email to alan.peterka@kirkwood.edu for assistance.
Remind: Communicating with Texts
Remind.com is a platform primarily supporting text-based communication. This communication can be one to many (mass texts), one to few (group texts), or one to one (private conversations).
Benefits of Remind
-
- Privacy: students will not know your phone number. Remind will assign you a unique number
- Available hours: instructors can set Remind to only contact them during business hours
- Contact options: instructors can choose how to be contacted (text or email); there are also options to use a mobile device or a computer with Remind
For more in-depth information than is provided here, visit the Remind help site.
Creating Accounts
Creation – Instructors teaching a credit course
Accounts are auto-created roughly 14 days prior to the open date of your Talon course; Kirkwood creates both an instructor’s account and classes in Remind.
An email is sent from Remind inviting an instructor to claim their classes (a simple process that involves clicking on them). If you don’t see this email, you can still log into Remind.com and claim your classes (see claim a rostered class for more information).
Be sure to use your Kirkwood Email address when logging in. Use the password reset page if you do not know your Remind password (it will differ from your Kirkwood password).
Creation – Everyone Else
To join the Kirkwood Remind school, text @a76hh2 to phone number 81010 or send email to alan.peterka@kirkwood.edu to have an account created. Please note that a free account has limits on class sizes and message length so it’s beneficial to make sure your account is associated with Kirkwood Community College school as an instructor.
Merging Existing Accounts
You may already have a Remind account in use (for example with your child’s school). If that is the case, we recommend merging your Remind accounts.
Follow the steps in the merging accounts tutorial if it applies.
Account Settings
Once in your account, visit the Account Settings area to make changes regarding how you will be contacted and when. Account settings can be found under your name menu in the upper left of the page on the Remind.com site and the mobile app.
Under the Account Settings section you will find:
-
- Profile: adds a profile image, customizes your display name, changes password
- Notification Preferences: adds email addresses, phone number, customizes office hours (teachers only)
- App Integrations: links accounts on other platforms (eg. Zoom)
- Widgets: embeds a class announcement stream
- Message History: exports lists of students in classes and announcements sent
- Archived Classes: manages list of past and current classes
- Blocked Users: manages list of blocked users
Class Creation and Adding Participants (Automatic and Manual)
A “class” in Remind is any meaningful audience that you need to send Announcements.
Some instructors choose to manually create their own classes so that they can collectively message all their students in the same course. When manually creating classes, you then also need to manually manage participant enrollment or have the participants join themselves (opt-in).
Creating a Class
-
- Click the Add class link and choose “Create new class”
- Enter a name for the class
- The class code can be customized (if you will ask participants to opt-in, it’s good to make it something easy for them to enter)
- Be sure to set the school to Kirkwood Community College
- Click Create
Adjusting Class Settings
The default settings on a class restrict the class from showing up in searches, does not require approval for participants to join, and allows participants to text the owner of the class.
To change any of these settings, you must be an owner of the class. Click the class name in your “Classes owned” list and then click “SETTINGS”. (Please note you can also update the class name, code and add co-owners on this page.)
Manually Inviting Participants
If you aren’t using an auto-created class, you will likely need to manually invite participants to your class. “Invite” is not completely accurate since this process adds students to the class and then lets them know how they can opt-out.
To manually invite students, copy/paste from a spreadsheet containing their name and up to two contact methods. Click the class name under the “Classes owned” list and then click “PEOPLE” at the top of the page. Finally, click the Add People button at the upper right. Copy the rows from your spreadsheet, place the cursor in the first row, and paste the copied rows. (Please note that you can only paste 150 rows at a time, and the maximum number of participants per class is 5000.)
Another invitation method is to have participants opt-in. Remind provides printable PDF instructions you can share with your intended audience and these are found under the “Add People” link on the left side of the screen.
Sending Messages
There are three types of messages you can send:
-
- Announcements: everyone in the class receives the message; only instructors see replies
- Conversations: selected individuals receive the message individually; only instructors see replies
- Group Conversations: up to 9 participants receive the message as a group; everyone in the message group sees replies
Desktop Messaging
You can use Remind.com to send and receive all Remind messages.
To begin, open the App, click on the pencil icon to choose your recipients. Choose from the list of your classes, groups, or individuals that you have listed; then click the “Create New” box and the Continue button. Compose your message and then click the Send button.
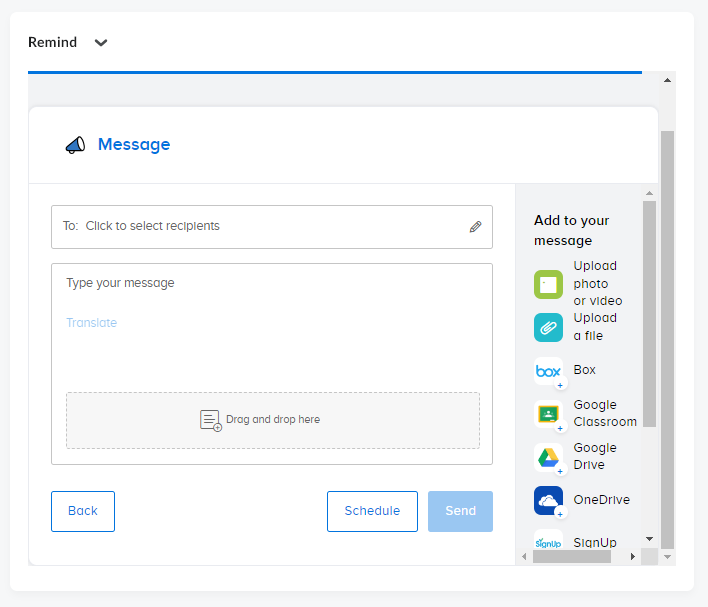
The buttons below the message entry allow you to attach items, translate the message into a user’s preferred language (this translation is automatically-generated and may contain inaccuracies), and set up a schedule.
Continuing a Conversation – Desktop
If you receive a reply with a question, you may need to continue your conversation (aka “chat”) at greater length; to keep such a conversation going:
-
- Click on the class where the conversation originated or click on “All Conversations”
- When in a class, click “MESSAGES” at the top of the window
- In the Conversations list, click on the name of the person
- Enter your reply into the “Chat with . . . ” text field and send when ready
Messaging – iOS Remind App
The same messaging options exist on the Remind mobile app. (If you are an Android user, refer to the sending messages help article for more information.)
Tapping “New Message” presents two options:
- An Announcement can be used to contact a whole class or individually-selected students
- A Conversation is always going to be sent to a group and members of that group will be able to see all replies. It is recommended to only use this group conversation when the situation calls for it (such as for individuals collaborating on a project)
Default Mobile Texting App
It is also possible to use your mobile device’s default texting app to receive and reply to students’ messages. As long as you have added your mobile phone number in the Account Settings > Notification preferences and enabled the device, you will receive Remind texts. The same privacy benefits are preserved when you reply to Remind-initiated threads from your default texting app.
Suggested Guidelines and Protocols
This is a list of best practices to consider when texting to Kirkwood audiences:
-
- keep it short and simple; 160 characters or less is the best. If a message needs to be an Email then send a text announcing an important email was sent
- don’t send confidential information – texts often display on locked screens for anyone in proximity to see
- identify yourself as faculty/staff at Kirkwood when starting a new message (e.g. “Hi, class! Alan at Kirkwood reminding you our Composition II Talon course opens today. Login and get started!)
- be specific regarding when action is required (e.g. “Please reply to this text or call me at (319)398-5598 prior to Friday, March 12.”)
- compose with business professionalism and text as you talk (avoid emojis that can have unexpected interpretations, avoid ALL CAPS)
- only use group texts when necessary for the situation
- limit the quantity of texts so students don’t end up blocking or opting out to avoid your messages (e.g. 5 or less per week + answering individual questions = this will naturally depend on the kind of conversations you are having)
- communicate with students how texting will be used
- don’t use texts for promotional announcements – additional regulations apply when selling or marketing via text
Socrative
Socrative offers instructors the ability to create in-class assessments “on-the-fly.” To learn more about Socrative, watch the informational video Socrative: Virtual Questioning.
Groups
Groups can be used in Talon for several purposes – Assignments, Discussions, or in combination with release conditions to customize content.
Creating Groups
The Groups tool can be found under Course Admin > Learner Management > Groups:
1. Create a category for your groups; click on the New Category button
2. Create a name for your group category (something like “Group Project” or “Persuasive Essay”) – the description is optional
3. Choose the “Enrollment Type” (you can choose between the number of groups or the number of students in a group; you can also choose between self-enrollment or auto-enrollment. The Advanced Property Options varies depending on the type of enrollment you choose)
4. Under Additional Options, you can select to setup a discussion or assignment submission areas
5. Click the Save button
Back on the Groups page, you’ll see the list of groups and the number of their members as well as the discussion attached to the group (if applicable). You can click on a group name to edit the group name OR view the group members and enroll users to the group.
Creating Group Discussions
When you create Groups, you can create Discussion topics for them:
1. Select “Set up discussions area” at the bottom of the Group Category page
2. Choose whether you want different topics for each group or one topic where students only see threads from their group members all on one topic: the first option allows you to see each group contribution separately, but is not easily graded, as only one topic can be tied to a grade item; the second option makes it a little more difficult for instructors to track discussion threads since they are all in one topic, but it is much easier to grade
3. A Description can be added to explain discussion prompts
4. Click the Save button
Groups and Release Conditions
Another use reason for using Groups is for customizing content for different Groups using Release Conditions. For example, if you are using one Talon shell for multiple sections, you could perhaps add a course schedule for a Monday / Wednesday / Friday section as well as a unique one for a Tuesday / Thursday section. To do this you will need to create Groups for each section, manually assign students into those groups, and then create “Release Conditions” for the content using the Groups as the criteria.
The “Progress” tab can be used in many ways to assist an instructor when tracking a student’s access and engagement in a course.
It’s important to understand the components of these metrics and where the data is collected to use them strategically. What information doe the “Progress” tab provide?
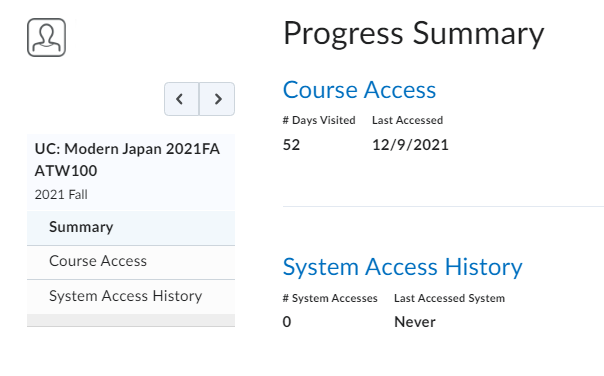
-
- Course Access: shares a student’s record for accessing a class (the Pulse App collects data on Talon website access, recording when a student accesses a course – defined as logging into Course Content)
- System Access History: shows a student’s record for accessing Talon (the Pulse App shares how many times a student has accessed Talon – not an individual class)
- Content Visited: tracks student activity only if students access materials via Course Content, not via the Calendar
- Content Completed: registers how much content (only if automatic completion tracking is set) students have accessed
- Assignment Submissions: indicates how many assignments have been turned in
