
6 Accommodations and Accessibility
Accommodations and Accessibility
Accommodation Settings
Instructors can grant accommodations through the Classlist tool (Course Admin > Learner Management > Classlist). Once granted, these accommodations apply to all Quizzes in a course for that particular learner.
Quiz-specific overrides provide an accommodation for any user on a Quiz-by-Quiz basis. When you overwrite an accommodation and click the Save button, a warning describing the impact of overwriting an accommodation appears.
-
- Navigate to the course > Course Admin > Classlist
- Click the action arrow [V] next to the student’s name and select “Accommodations”
- Enter the settings and Save.
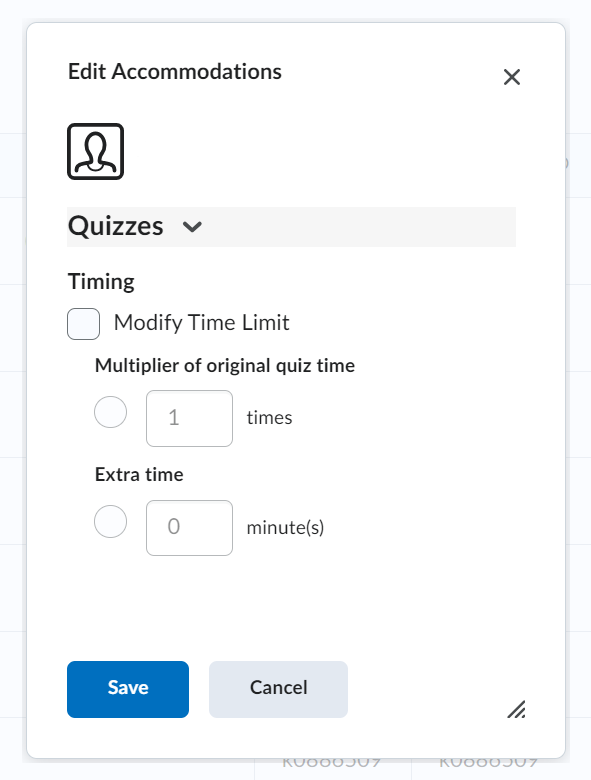
Accommodation options currently available include:
-
- Timing: time allotted to take a quiz can be modified in terms of time multipliers (for example, 1.5x quiz time) or +minutes (for example, an additional 30 minutes)
- Controls: the right-click restriction in quizzes prohibits students from using the right-click feature of their mouse while taking a quick
ALLY File Accessibility in Talon
Blackboard ALLY aids instructors in increasing the accessibility of their course in three core ways:
-
- It allows alternative file formats to be generated
- It provides accessibility scores based on a wide range of metrics
- It shares specific feedback on exactly what is having a negative impact on accessibility and aids in the process of fixing the problem
Alternative Formats
ALLY makes it possible for students to generate their own alternative formats to the files you provide. This, for example, allows an individual with a visual impairment to generate an electronic braille version of an uploaded Word document.
Best of all, this feature requires very little setup from an instructor; nonetheless, there are a few considerations to keep in mind. So what is the setup process?
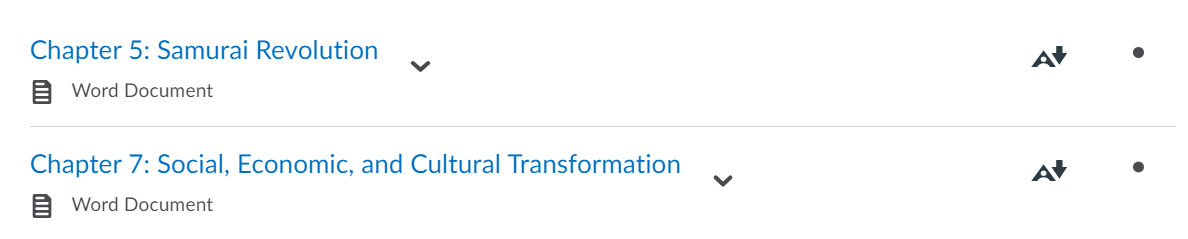
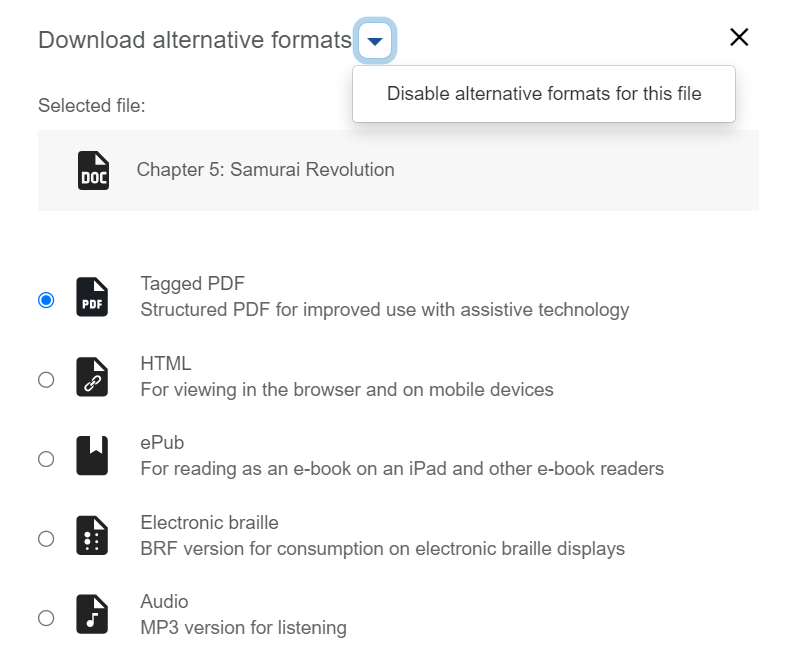
Whenever an ALLY-compatible is uploaded within the Course Content section of a course a “Download Alternative Formats” icon (large letter “A” with a download arrow) will appear on the right of that file.
ALLY cannot create alternative formats for files unless they are directly in Course Content. Because of this, if you want to ensure ALLY can generate alternative formats, consider creating a submodule and then adding both the assignment and your file to that submodule (this strategy works with quizzes and discussions, too).
Clicking the “Alternative Formats” icon displays a list of formats ALLY can use to present that file. The list varies depending upon the type of original file, but the possible alternative formats are:
-
- OCR’d version
- tagged PDF
- mobile-friendly HTML
- audio
- ePub
- electronic braille
- BeeLine Reader
As an instructor you have the option to prevent students from downloading alternative formats, should you so choose.
The files compatible with ALLY include:
-
- Microsoft Word
- Microsoft Powerpoint
- OpenOffice/LibreOffice
- uploaded HTML files
- content created in Brightspace’s WYSIWYG HTML Editor
Accessibility Scores
ALLY assesses the following elements in Talon:
-
- Discussion Topics
- files
- web links
- Modules
- Quiz descriptions
After ALLY completes its review process, there are a few things to be aware of when making your course more accessible. Files found directly in Course Content receive an accessibility score indicator (along with an alternative format icon, if the file is a supported file type for that process). The possible indicators and their descriptions are as follows:

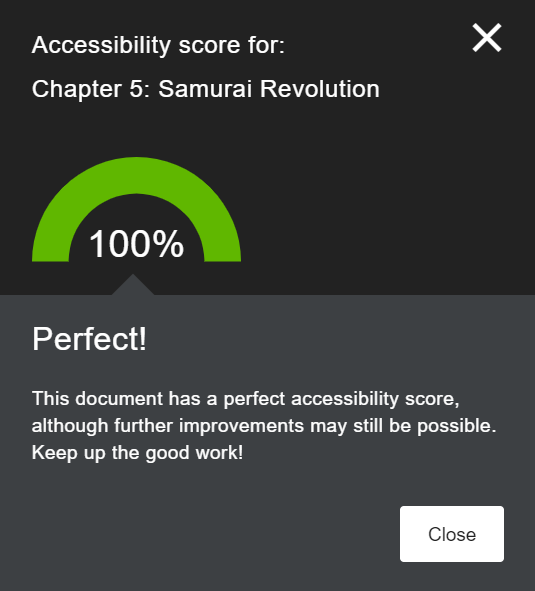
The goal with ALLY is to achieve a content accessibility score of 67% or higher. This may not be achievable all at once; the goal is gradual improvement, not instant perfection.
Clicking the accessibility score icon loads a screen that shows you the rating percentage, the most significant concerns with the file, and any recommendation ALLY has for resolving the issue (sometimes, however, a solution may not be generated – as shared below).
Clicking the All issues button is highly recommended because you can gain a holistic sense of how many accessibility issues there are with your file as well as guidance on how to fix them.
Instructor Feedback
ALLY also provides a complete course accessibility report sharing analyses of the content that is most problematic.

To run and receive a full course report:
- The ALLY course report is only accessible via the “ALLY Instructor Tools” widget which must be added to a course homepage
- This video explains setting up the “ALLY Instructor Tools” widget
- Go to Course Admin > Site Setup > Homepages
- If the active homepage is editable, click on it to open its edit menu; otherwise, click the action arrow [V] next to the currently active homepage and click “Copy”
- In the “Active Homepage” dropdown box, change the active homepage to your copy and click on the copy to open its edit menu
- Scroll down to the widgets section of your homepage and click the Add Widgets button
- Locate the “Ally Instructor Tools” widget, checkmark it, and then click “add” (if you are not happy with where it is placed you can drag it to another location)
- Save your changes / updates and close the window
- Click the link to view your Course Report
- The report breaks down your course content by the file type
- Fix errors by using the Start button next to the type of error you want to address, or navigate to the “Content” tab and look through the issues assignments have one at a time
- In the section entitled “Remaining issues,” which sorts content accessibility issues by problems they have in common, so you can see if there’s a particular issue affecting a large amount of your course content

Additional info about ALLY is available by visiting Ally for LMS Help for Instructors.
PPT Accessibility
To learn more about making PowerPoint presentations accessible, visit WebAIM’s tutorial.
Correcting Automatic Closed Captioning Using YouTube
All videos used in your course are required to have closed-captioning.
YouTube has great automatic closed-captioning tools, but you have to check the captions for accuracy. How can you address the accuracy of YouTube’s closed-captions?
1. Literally, the first step is creating a YouTube account and uploading the video file to that account; need to learn more? Visit this tutorial on Uploading a video in 2020
2. Once the file is uploaded, click your initials icon in the upper right corner of the YouTube page and select YouTube Studio
3. In Your Channel menu on the left, click on Subtitles
4. Click on the video in which you want to create or correct captions
5. To edit the automatic captions, click on the three-dot options menu at the far right under the Subtitles column and choose Edit in Classic Studio
6. Click the “Edit” button above the video at the right of the screen
7. Now you can edit any text within the boxes at the left. If extensive corrections are needed, be careful to not add too much text to any one line. The time at the left indicates when in the video the caption will display
8. Use the video playback to verify your captions are accurate and properly timed
9. Once you have made all your corrections, click the Save Changes button at the upper right
10. If you get the message “Overwrite existing subtitles” choose “Publish”
